Intro to woodworking: Making your own cutting board
The limmat was chilly 19.8°C when this was posted. 12 min readI did a short woodworking last week. It was a 5 hour course that taught the basics on how to use woodworking machines safely. You apply what you learned to make your own cutting board out of solid wood. To solidify what I learned I already went a second time to make another board and I’m super happy with the end result!
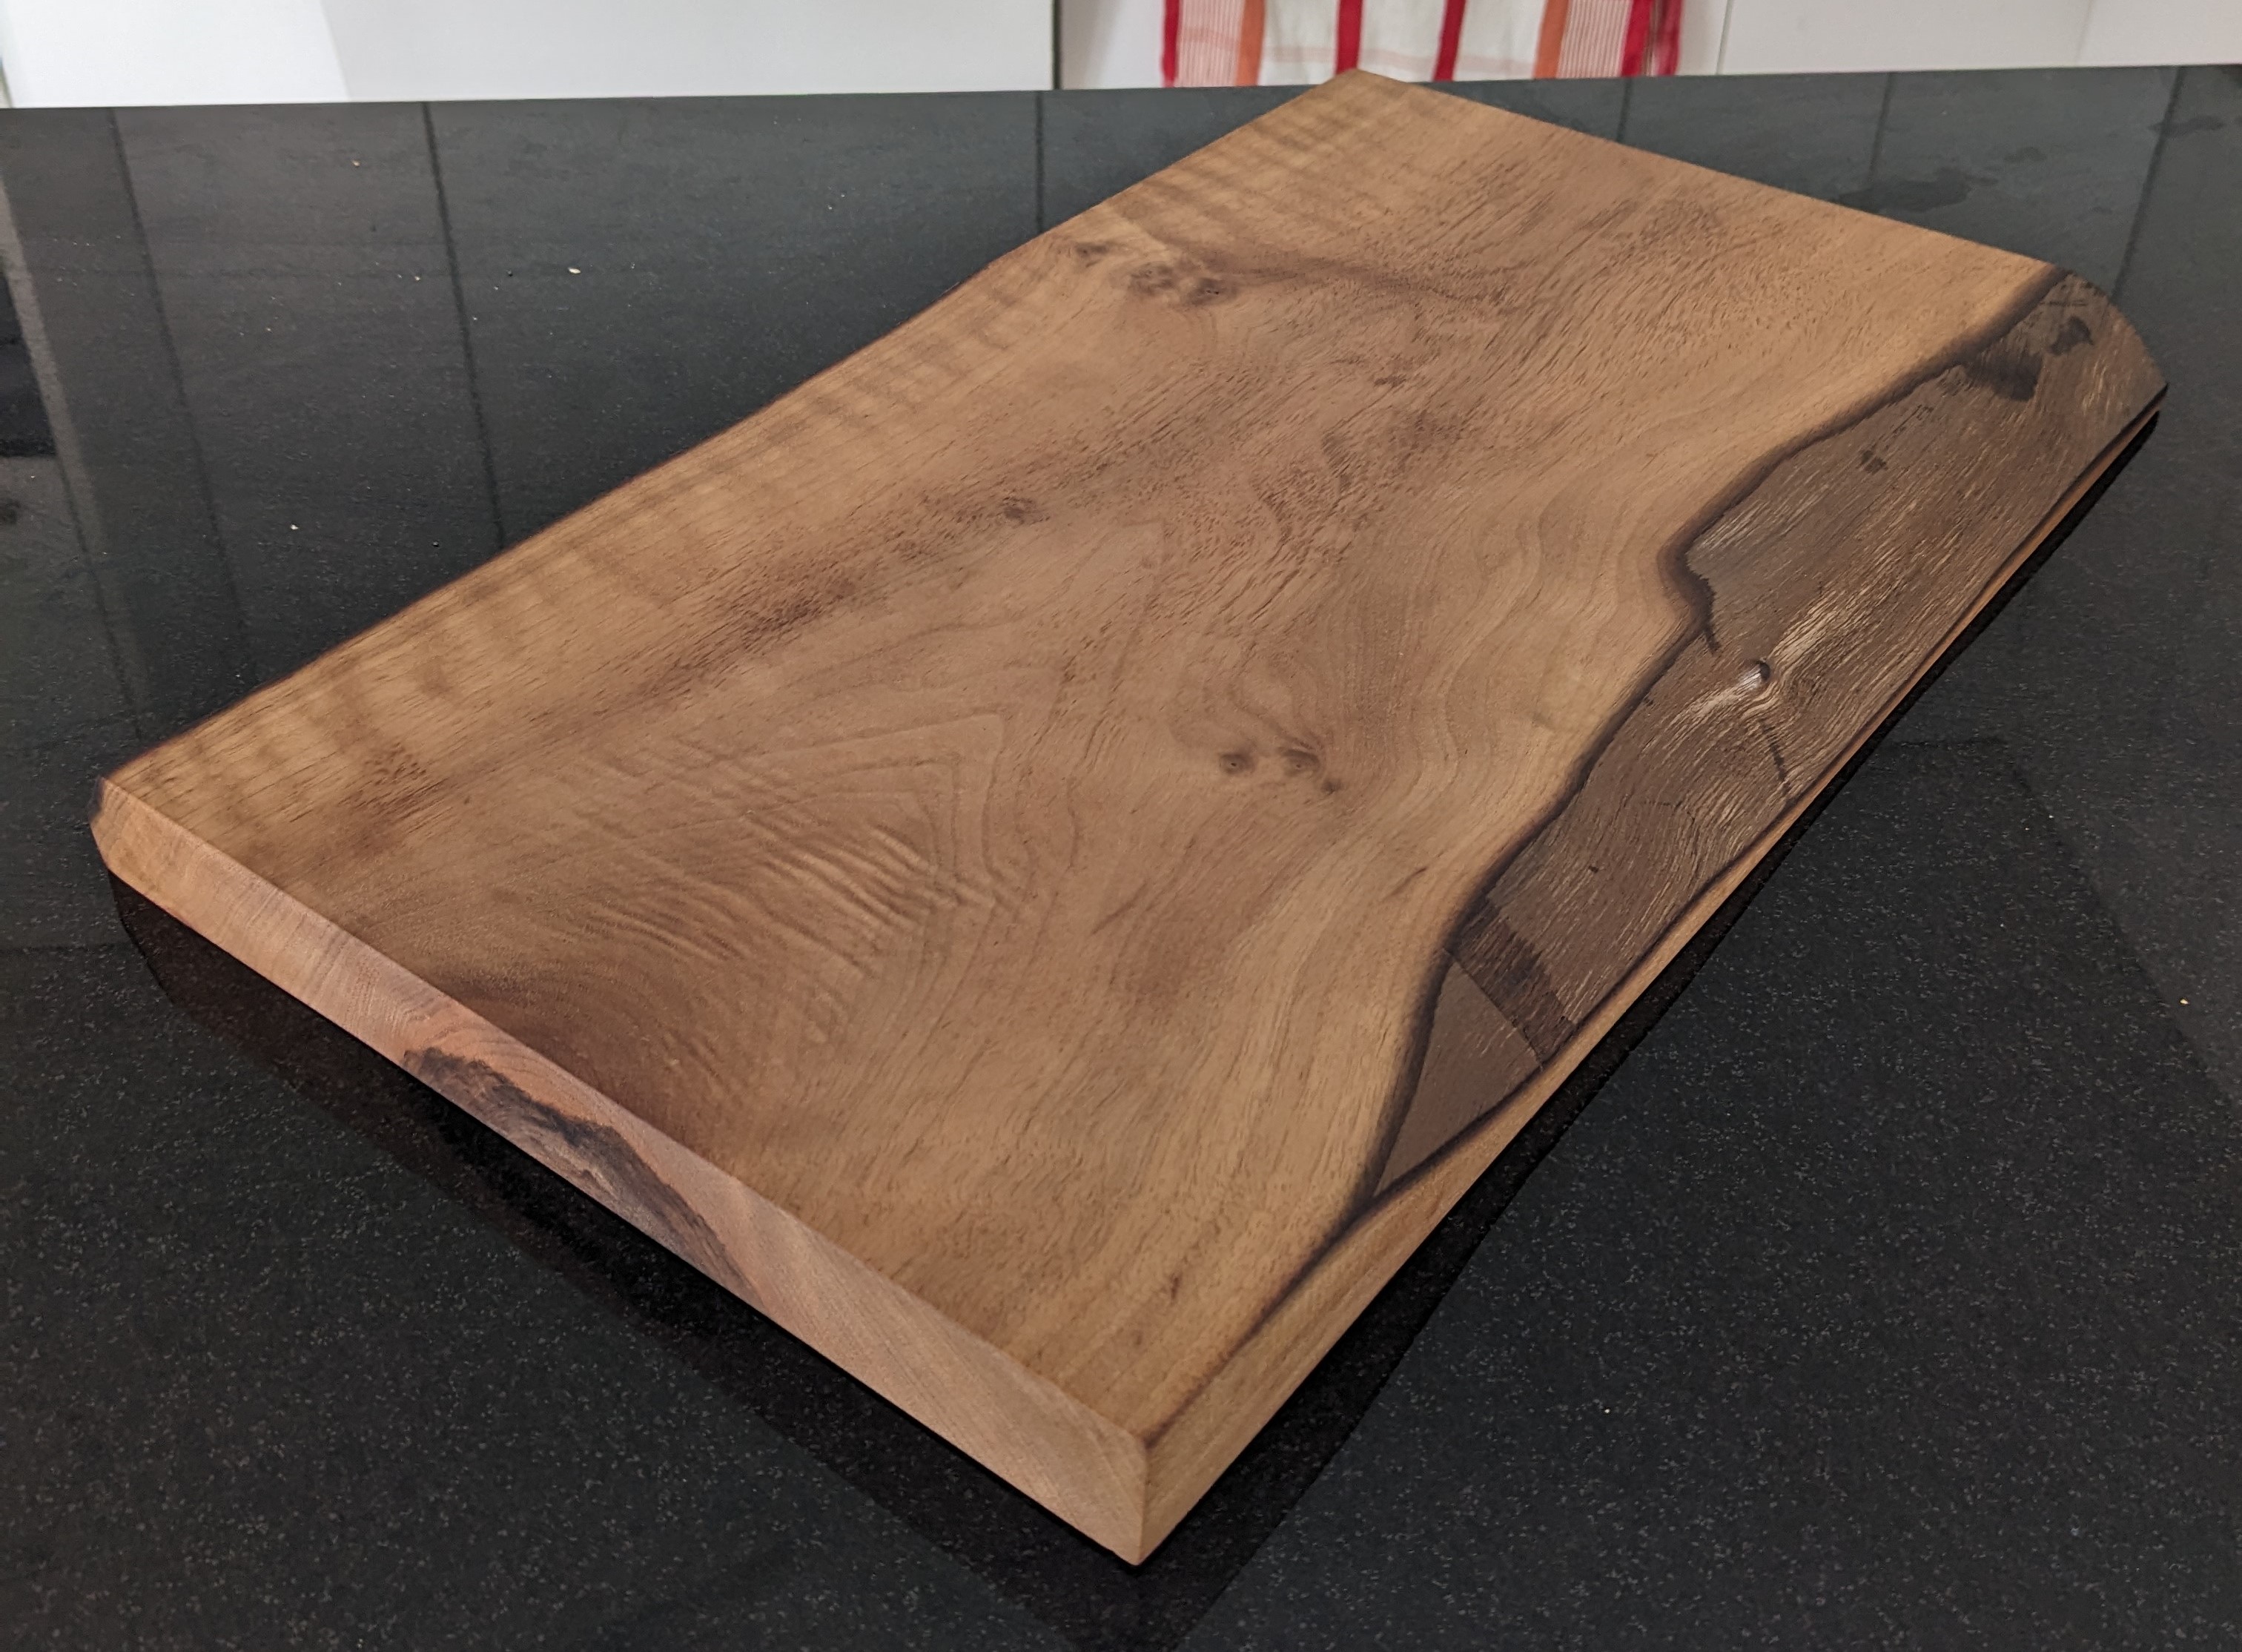
The 2nd cutting board (45x26x3cm). I made it out of walnut wood and decided to keep the beautiful wood bark on this time.
In the beginning I found the course quite intimidating. These are heavy-duty, industrial machines. They are quite loud and it’s clear you can easily hurt yourself if you don’t know what you’re doing. We practiced on the following machines:
- Circular table saw: trimming and cutting solid wood.
- Surface & thickeness planer: making a wooden plank flat and making a plank the same thickness everywhere.
- Disc sander: rounding off edges.
- Milling cutter: making a hole through your board (e.g. to hang it) or for rounding the edges along an axis.
- Band saw: cutting your board in special shapes, e.g. to make a handle for your cutting board.
- Portable wood router: creating a small catcher for liquids.
- Sanding machine: making your board real smooth.
To make sure I don’t forget the process of making a cutting board, I thought I’d write down what I learned and what steps are taken to make your own. In the pictures below I’ll be mostly using pictures from the process of making my second cutting board.
Step 1: Choosing your wooden plank
In the wood workshop there’s a variety of wooden planks you can start from, from all kinds of trees. You only pay for what you use, so you don’t have to worry about starting off from a very long plank. You are free to choose any plank you like, so you can really think about which one would look good as a cutting board (or whatever other project you have in mind). I chose walnut, which is considered a ‘premium quality’ wood and is actually the most expensive material you can use, but to be honest for such a small piece such as a cutting board the price difference ends up being not so large anyways.
| Wood material | Price per m3 (swiss francs, CHF) |
|---|---|
| Swiss stone pine | 1980.- |
| Maple | 2100.- |
| Larch | 2200.- |
| Cherry | 2520.- |
| Pear | 3200.- |
| Elm | 3200.- |
| Oak (dark) | 3450.- |
| Oak | 4018.- |
| Walnut | 5100.- |
After the first cut (described below in step 2) I ended up with a piece which was 500x200x40mm, so I paid 0.004m3*5100, which is 20.40 swiss francs in material costs.
Step 2: Cutting solid wood and trimming your board
After choosing a long plank, the next step is cutting it to the size you want. To do this you use the table circular saw machine, which is the largest machine in the workshop. It’s also the first machine we learned about and there’s quite a few things to pay attention to:
- Your hand must always be a hand-length away from the blade, even when turned off. Use a push block if necessary. There are special positions for your hand to hold the wood piece depending on what side of the machine you are.
- Turn off the machine before touching/moving the piece you have cut. If it requires getting close to the blade, use a wooden stick/helper to move it.
- What fence you use on the machine depends on the direction of the cut relative to the length of the board. If you’re doing a cross cut (i.e. a cut against the short axis) it’s one fence, but if it’s along the long axis, you use a different fence, called an angular stop.
- The board must always be touching the fence (depending on the fence in at least two spots). This ensures the board is stable and doesn’t move while touching the saw.
- The position of the saw blade depends on the kind of wood you are using. When starting with raw solid wood you want the saw on the upmost position. This reduces the risk of a kickback, as when the blade touches the wood the force is mostly downwards. For composite wood or solid wood that has already been worked on it’s ok to lower the saw. A lower saw makes a smoother cut.
- Don’t stay in front of the blade when cutting wood. Instead stay to the side. This is to reduce the risk of getting hit by kickback. While this advice protects you, it doesn’t protect people working on machines in front of the blade 😅.
- Always ensure whatever is being cut off has space to go/escape (i.e. make sure you are using the fence correctly, it shouldn’t block the wood piece being cut off from escaping after being cut; this makes sure there’s space between the wood and the blade after being cut). This again reduces the risk of kickback.
- This circular saw in particular has a riving knife in the back of the blade. This ensures you can’t reverse an already cut piece into the back of the blade (this would throw the piece upwards!).
- If your piece is not getting cut, do not force it into the blade, go back and push again.
- Try to maintain a constant pace when going through the blade. Don’t take too long as otherwise you burn the wood on the side.
- Once you are done using the machine hit the ’emergency stop’ button. This button locks the machine from starting. This ensures people unfamiliar with the machine don’t know how to remove this lock and start it again.
I’m sure there’s something I forgot about, it’s quite tricky to remember everything and it seemed like there’s so many different cases on how to handle the circular saw. Our instructor did however mention that there’s surprisingly few accidents on this machine and that they typically happen on the smaller machines which are less intimidating. The video below is great at showing and explaining how kickbacks can happen.
On the picture below you can see how I started from a very long plank and I’m doing a cross-cut. In this case the fence is only along the long axis of the wood and there’s no fence on the direction of the cut. This is working as intended, as we need space for the wood to go on the right side. Alternatively you can have some support, but the fence along the direction of the cut shouldn’t go past the blade. This is again ensuring there’s space for the wood to go.
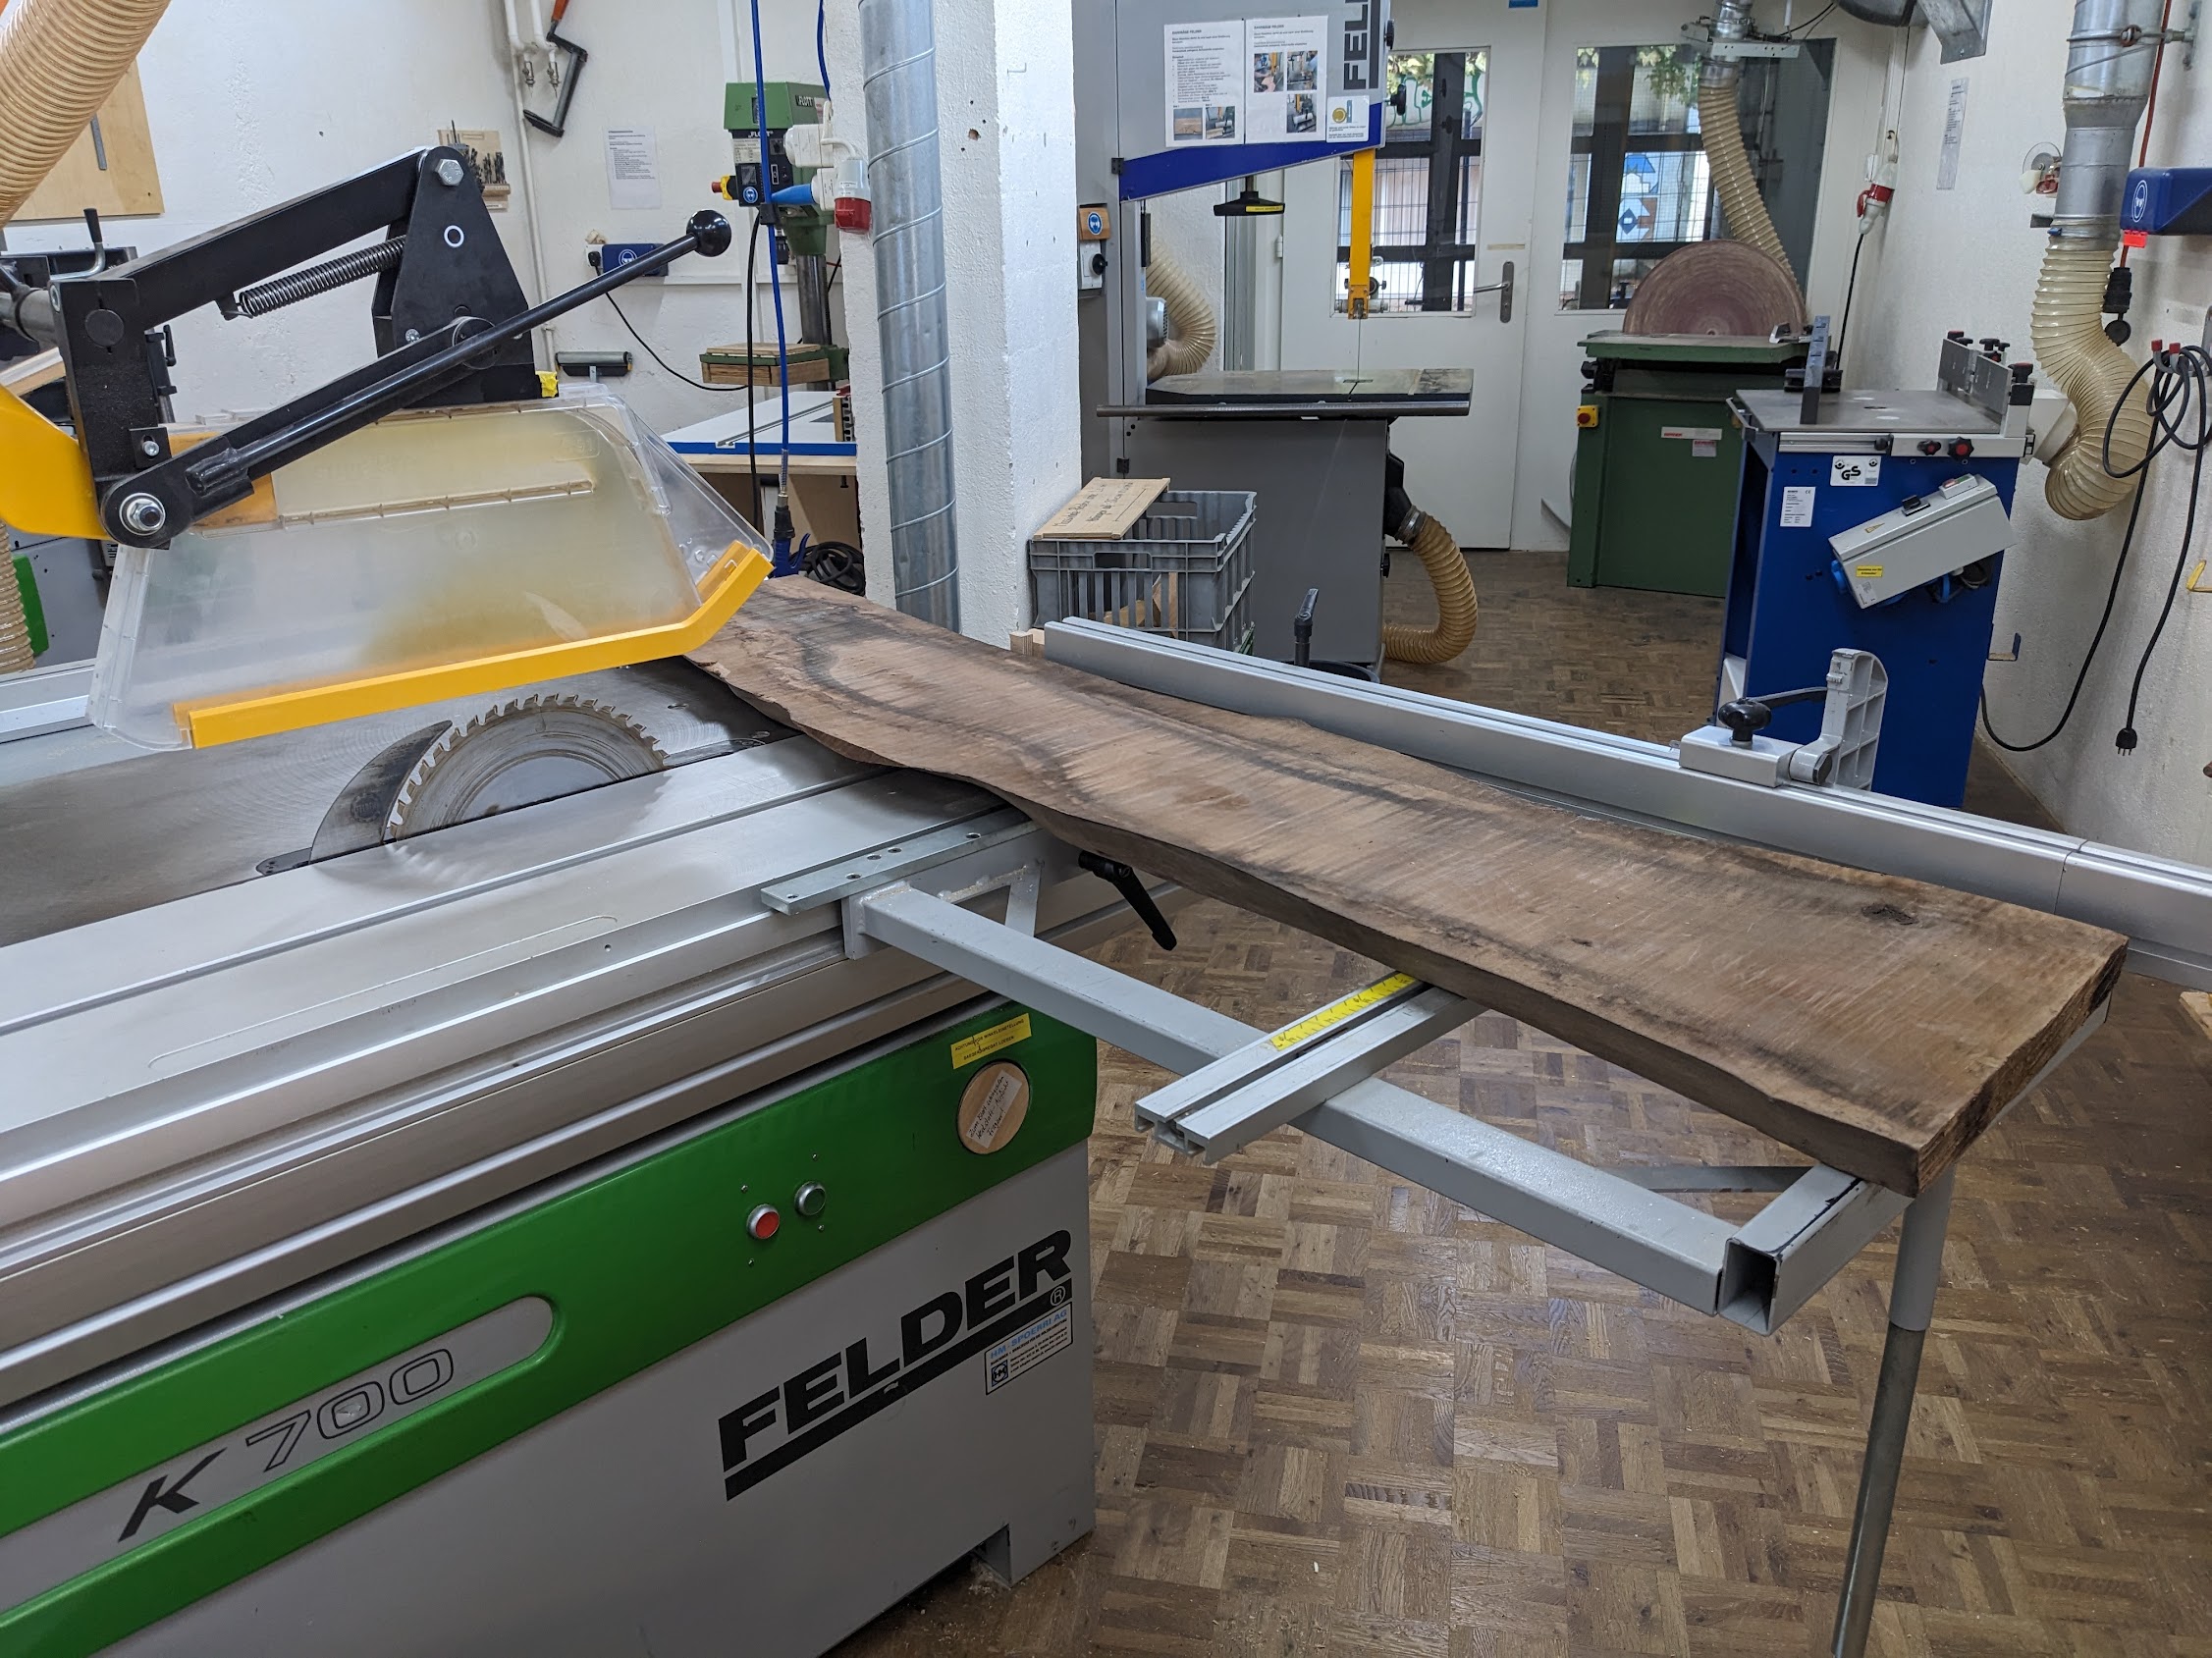
A cross cut using a fence along the wood.
Afterwards you’re left with a smaller piece of wood, roughly in the shape of the board (this is the material you pay for; the rest of the plank is returned). You still need to make all 4 sides straight.
Next cut is no longer doing a cross-cut, but rather cutting in the same direction as the long edge of the wood. I’m doing this to make this side straight and in this case you can see I’m using an angular stop (in black). You don’t have much choice besides the angular stop because none of your edges are straight to use against a lateral fence. To make sure the wood stays in place, you make a notch into the wood by pushing it against the angular stop.
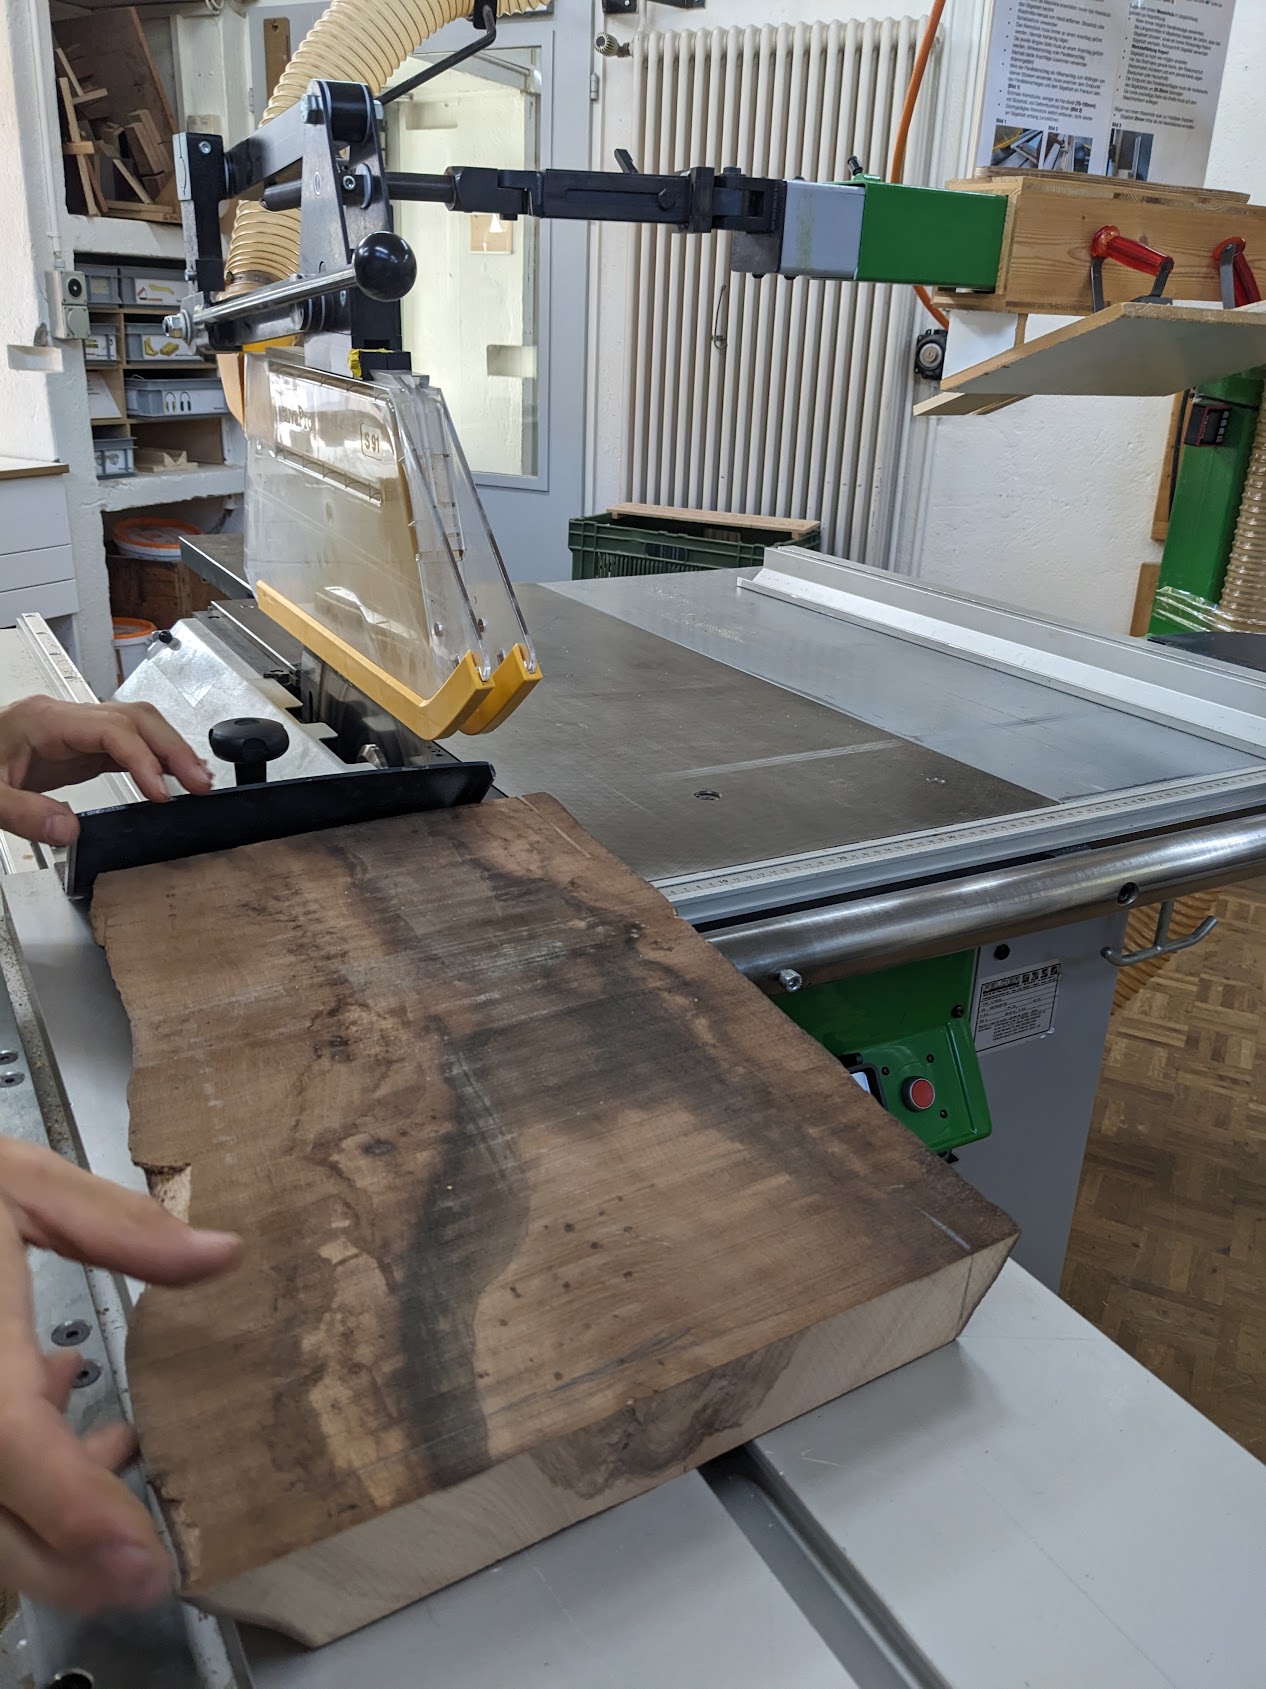
A cut along the long edge of the wood using an angular stop.
Then we’re cutting the other edge. This time we cut from the other side of the saw using a lateral fence, as now we have a straight edge we can use to align it with the fence. We have to be careful here and ensure the lateral fence does not beyond the blade (kickback risk). The additional advantage of cutting with a fence is that we can ensure the board has a particular width.
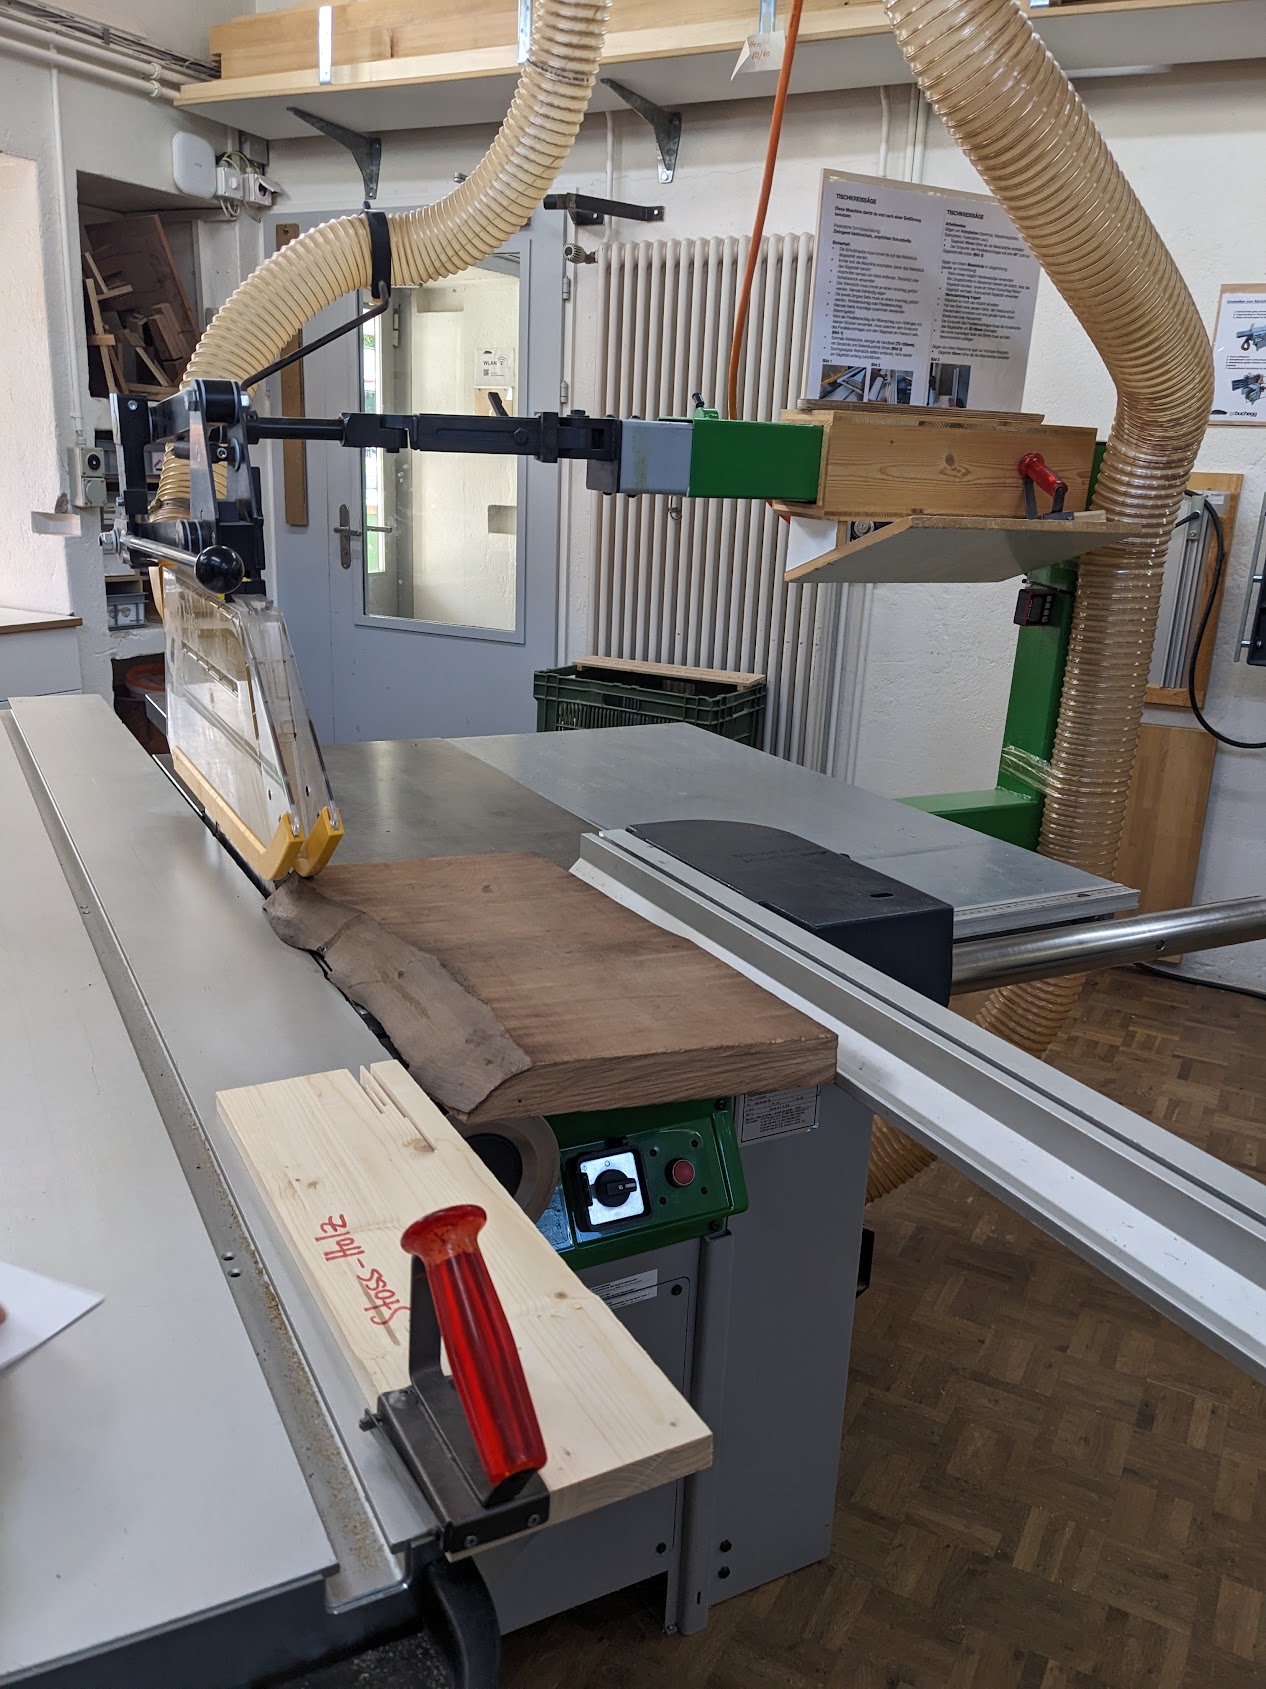
Flattening the long edges.
Now that both of the long edges are straight and parallel to each other, we’re ready to use the planer. Note that we still have to come back to the circular saw to make the short edges straight as well.
Step 3: Making one side of your board flat
The next step is making one of the sides flat using the surface planer. Of course, there’s yet another thing you need to pay attention now. To decide what side to make flat, it depends on the length of the board. For a short piece like a cutting board, you want to use the side which wobbles the least. For a long piece it’s the opposite.
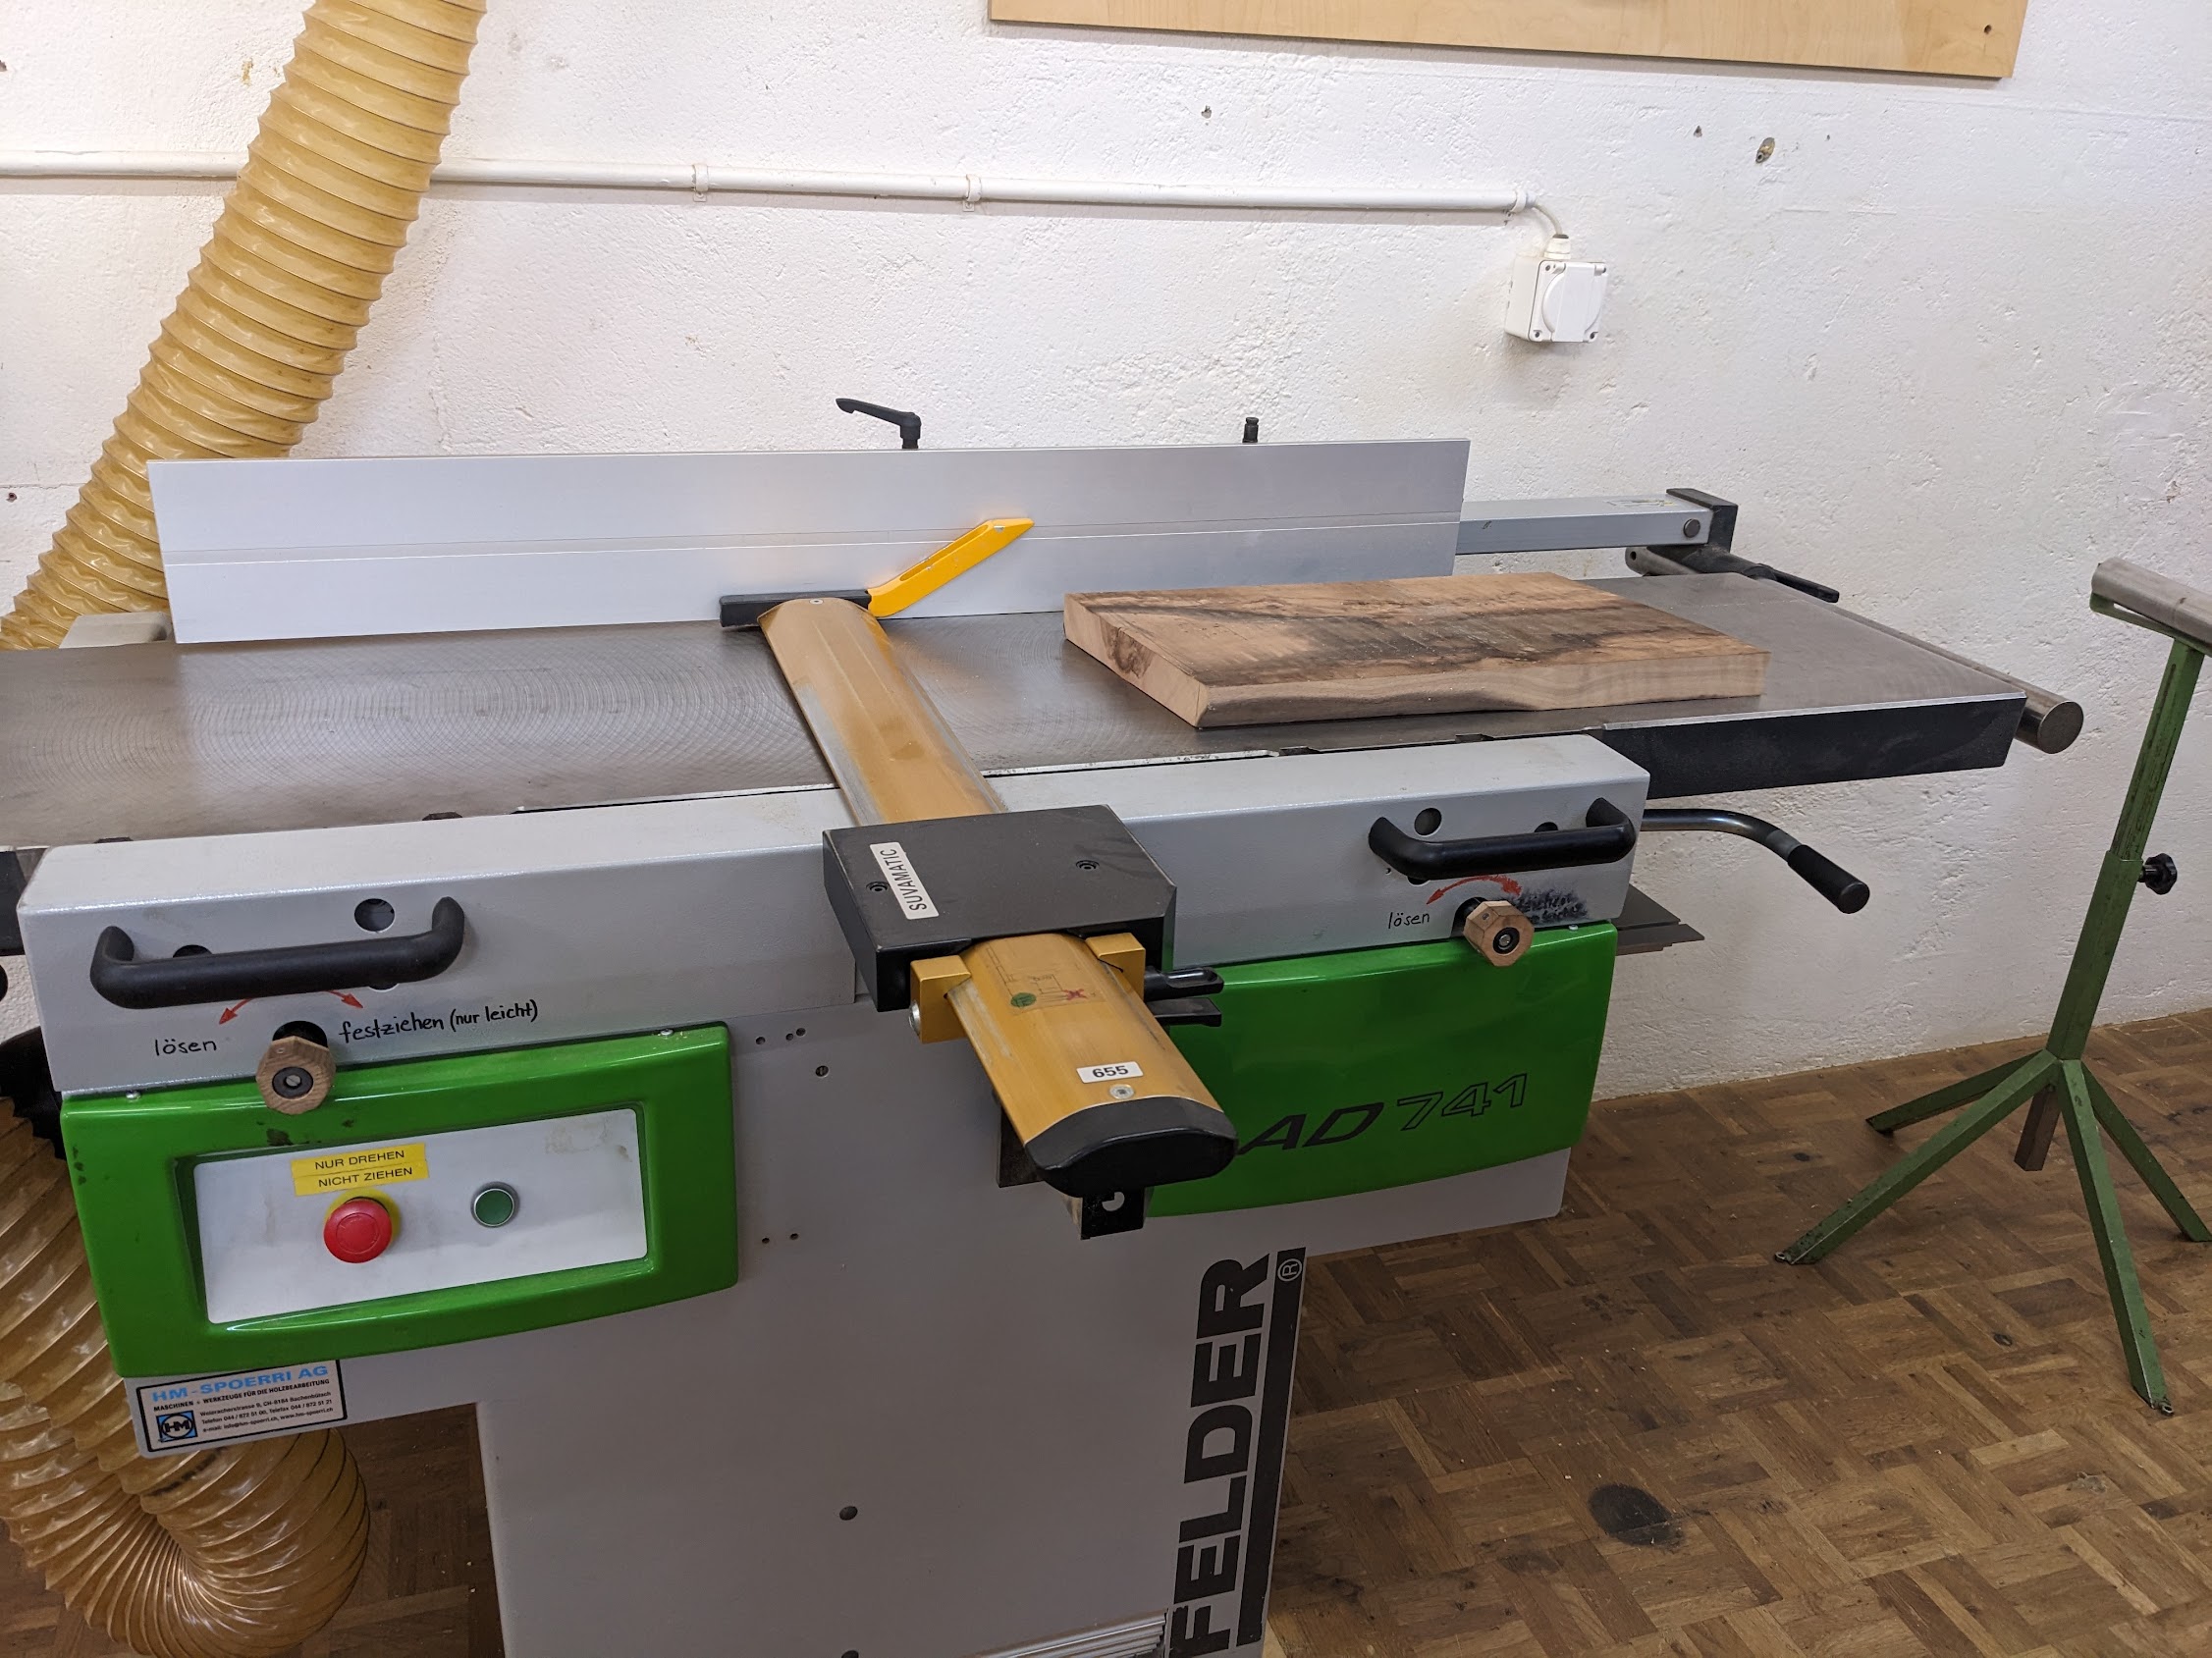
We’re using the surface planer on the side that wobbles less.
You can control how much you’re cutting off using the handle you see on the bottom right. You start with it fairly high and lower it until you get a flat surface. To use the planer, turn it on, lift the cover and place the board directly below the cover but not touching the planer blade. Slide it across by putting both of your hands on top of the board and moving it across. Your hands go over the cover and you never see the blade.
Once you have a flat side, you can now make the long edges flat as well.
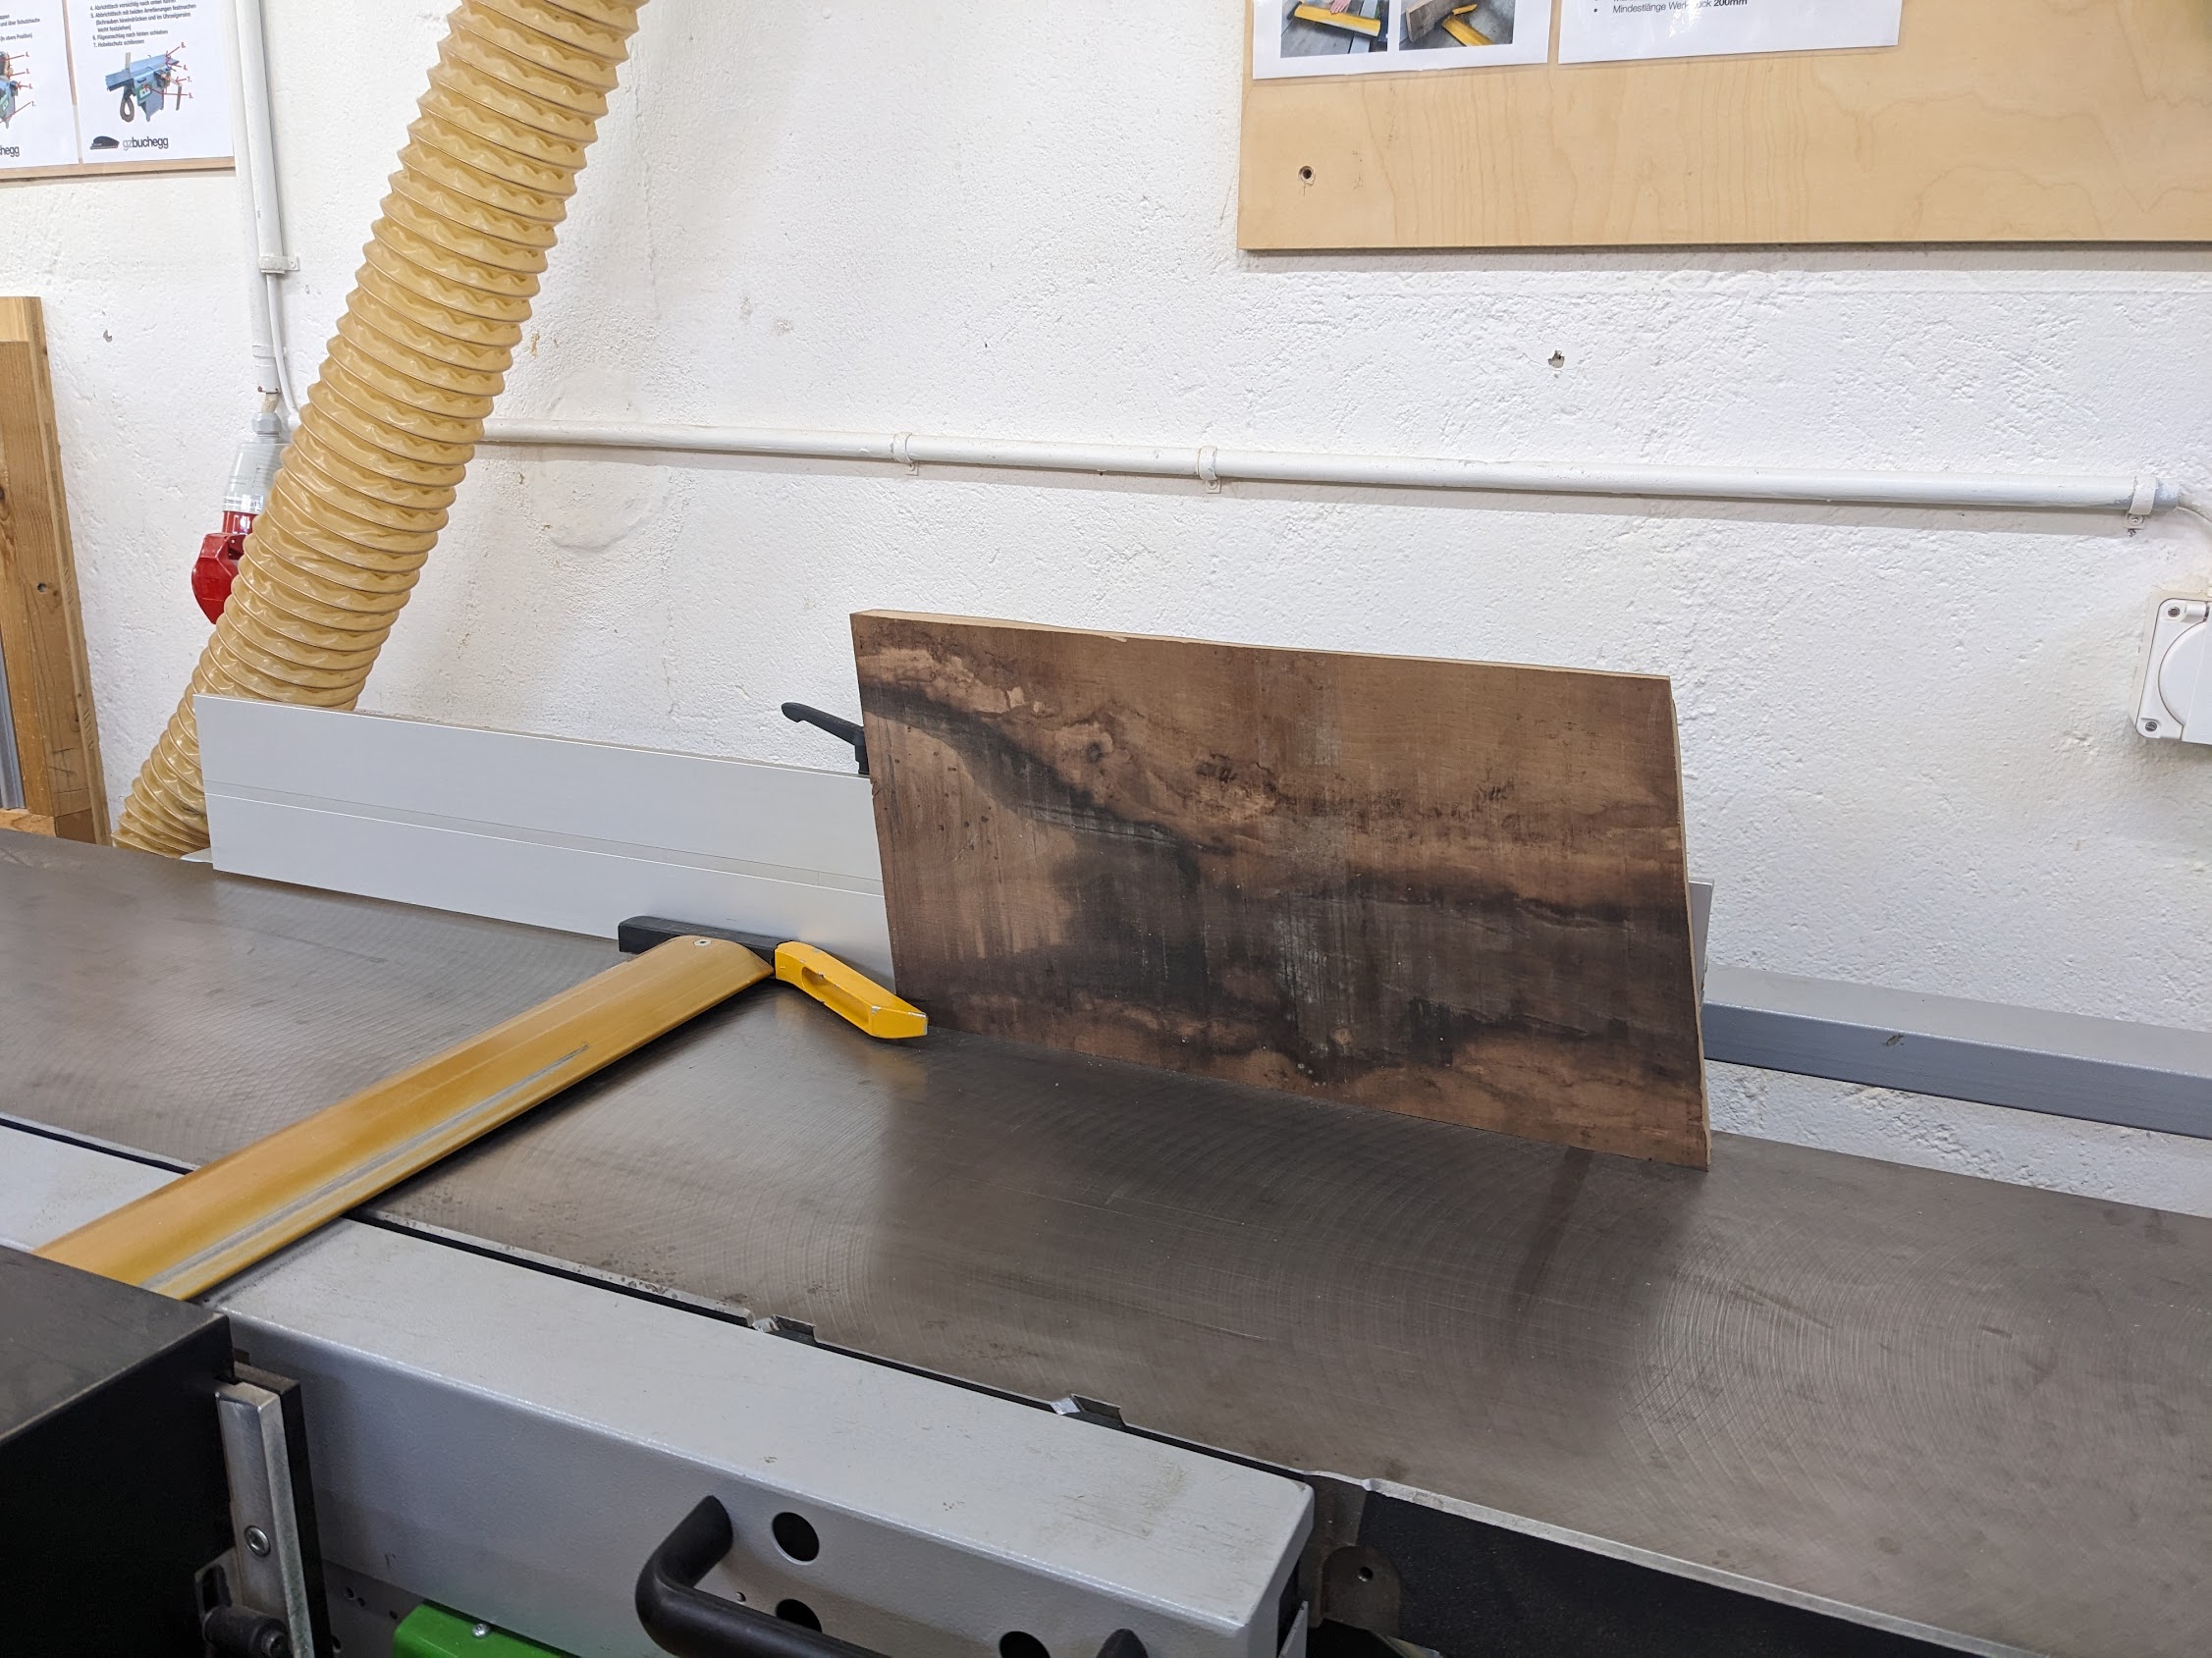
We’re using the surface planer on the side that wobbles less.
Important: Resist the temptation of making the short edges flat. They are not straight and trying to use the planer on the short edge is dangerous because you don’t have enough support to do this. Additionally this is the hardest side of the wood. You can not use the planer to do this. Instead, we will go back to the circular saw afterwards to make these sides straight as well.
Also, do not make the other side flat. We will cover this is the next step.
Step 4: Making your board the same thickness everywhere
Now that one of the sides is flat, you can make the other side flat as well by using the thickness planer. This will make sure your board has the same depth everywhere.
In the case of this workshop, it’s the same machine to make a surface flat and also to make a board the same depth everywhere. There’s instructions on the wall explaining how to configure the machine.
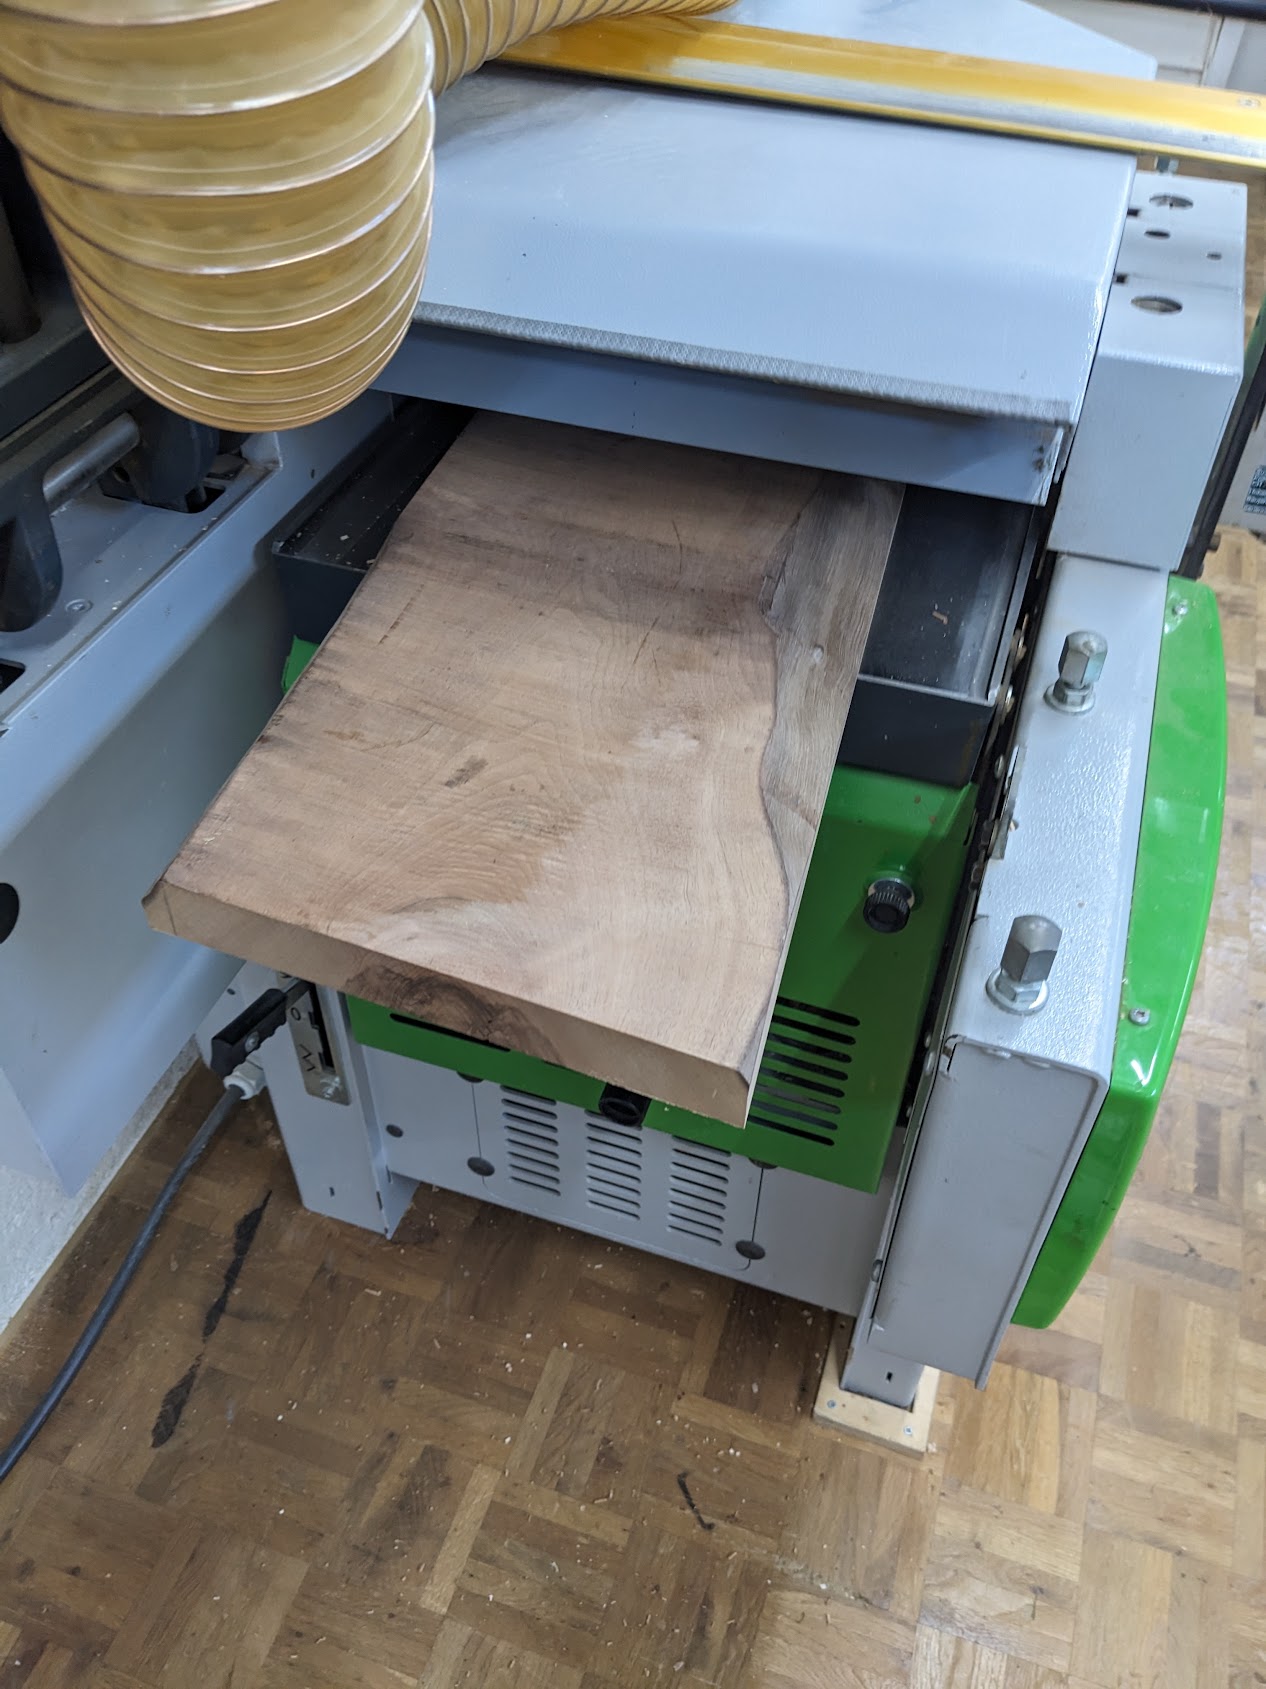
Using the thickness planer to make your board have the same depth everywhere.
Now you need to measure the height of your board on the 4 corners, as they can be different heights. The machine is only capable of cutting 2mm every time, so you want to set the depth to the biggest depth minus 2mm. In my case it was thickest at 36mm, so I started with 34mm, with the end goal of ending up at 30mm. You will use the planer on both sides this time, each time reducing the depth by 0.5 to 1mm until you have a somewhat smooth surface and the desired thickness.
The nice thing is that this part is kind of automatic. As soon as the blade grabs the board it will automatically slide it across for you.
Important: You put the flat side down on the band! This is why we had to make one side flat first. The board should not wobble at all when going into this machine, as this is what ensures it will have the same thickness everywhere.
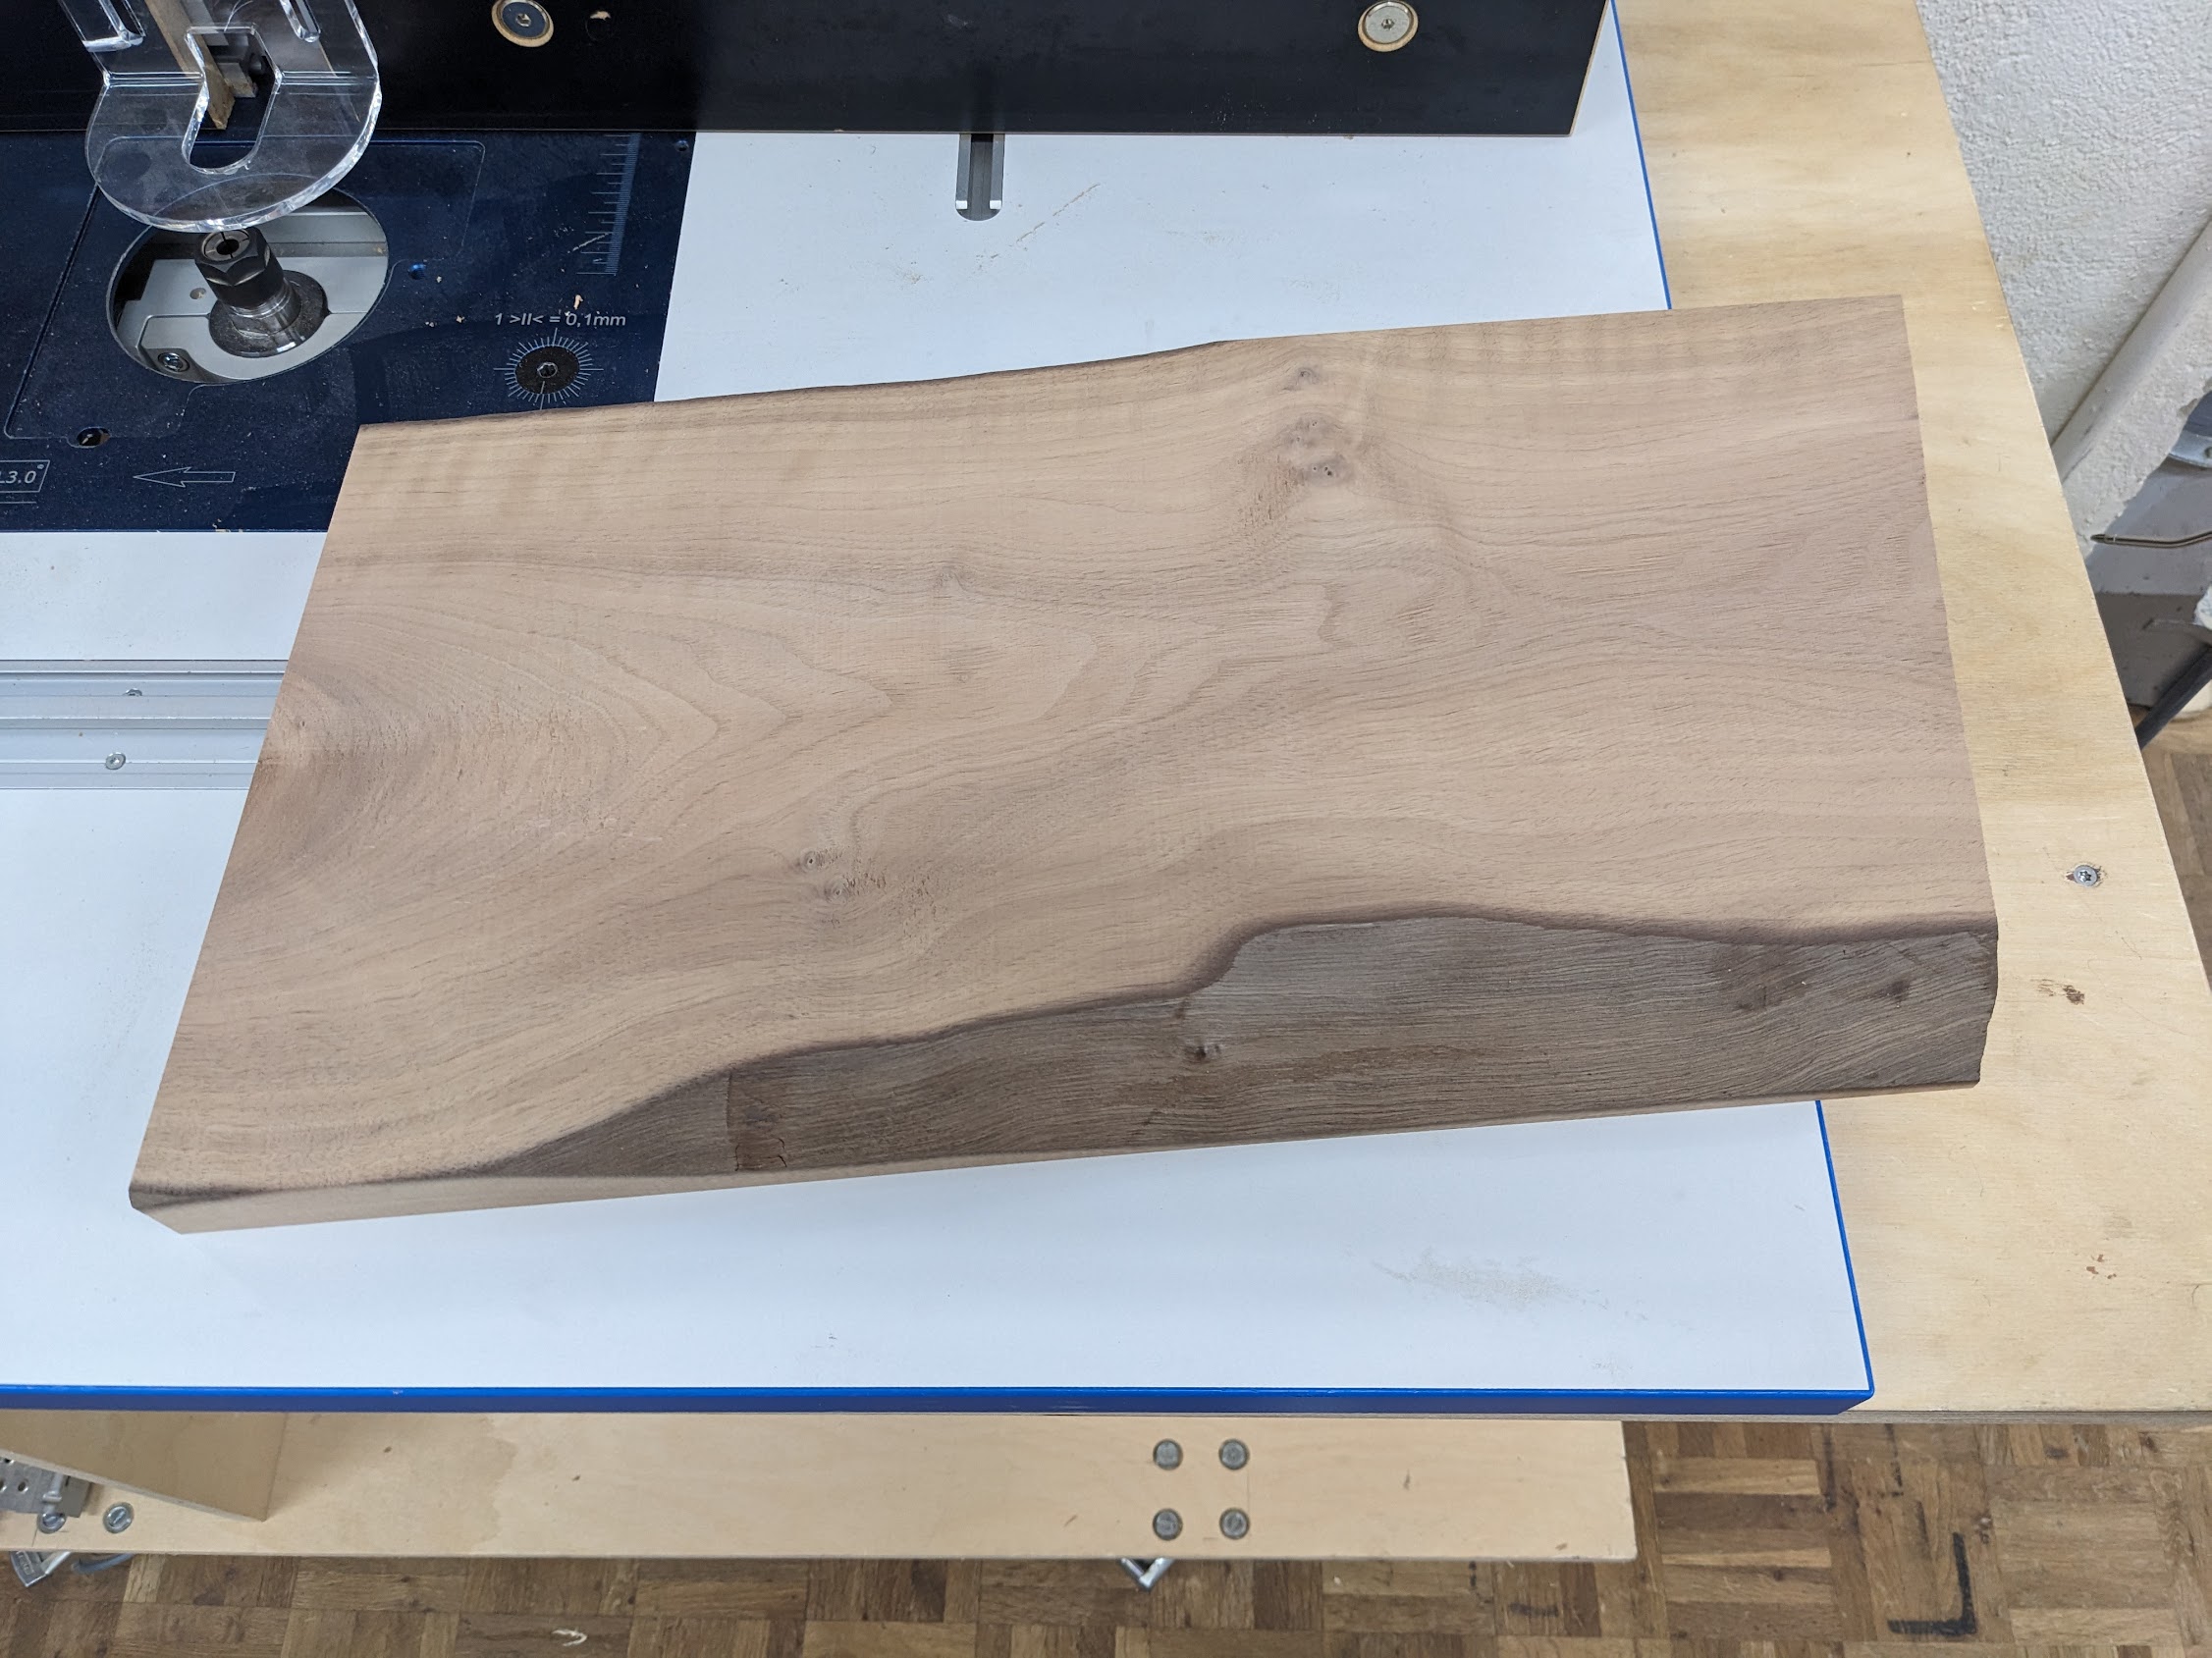
The result so far. I unfortunately didn’t align the board, but you can see that the short edges are not perpendicular to the long edges.
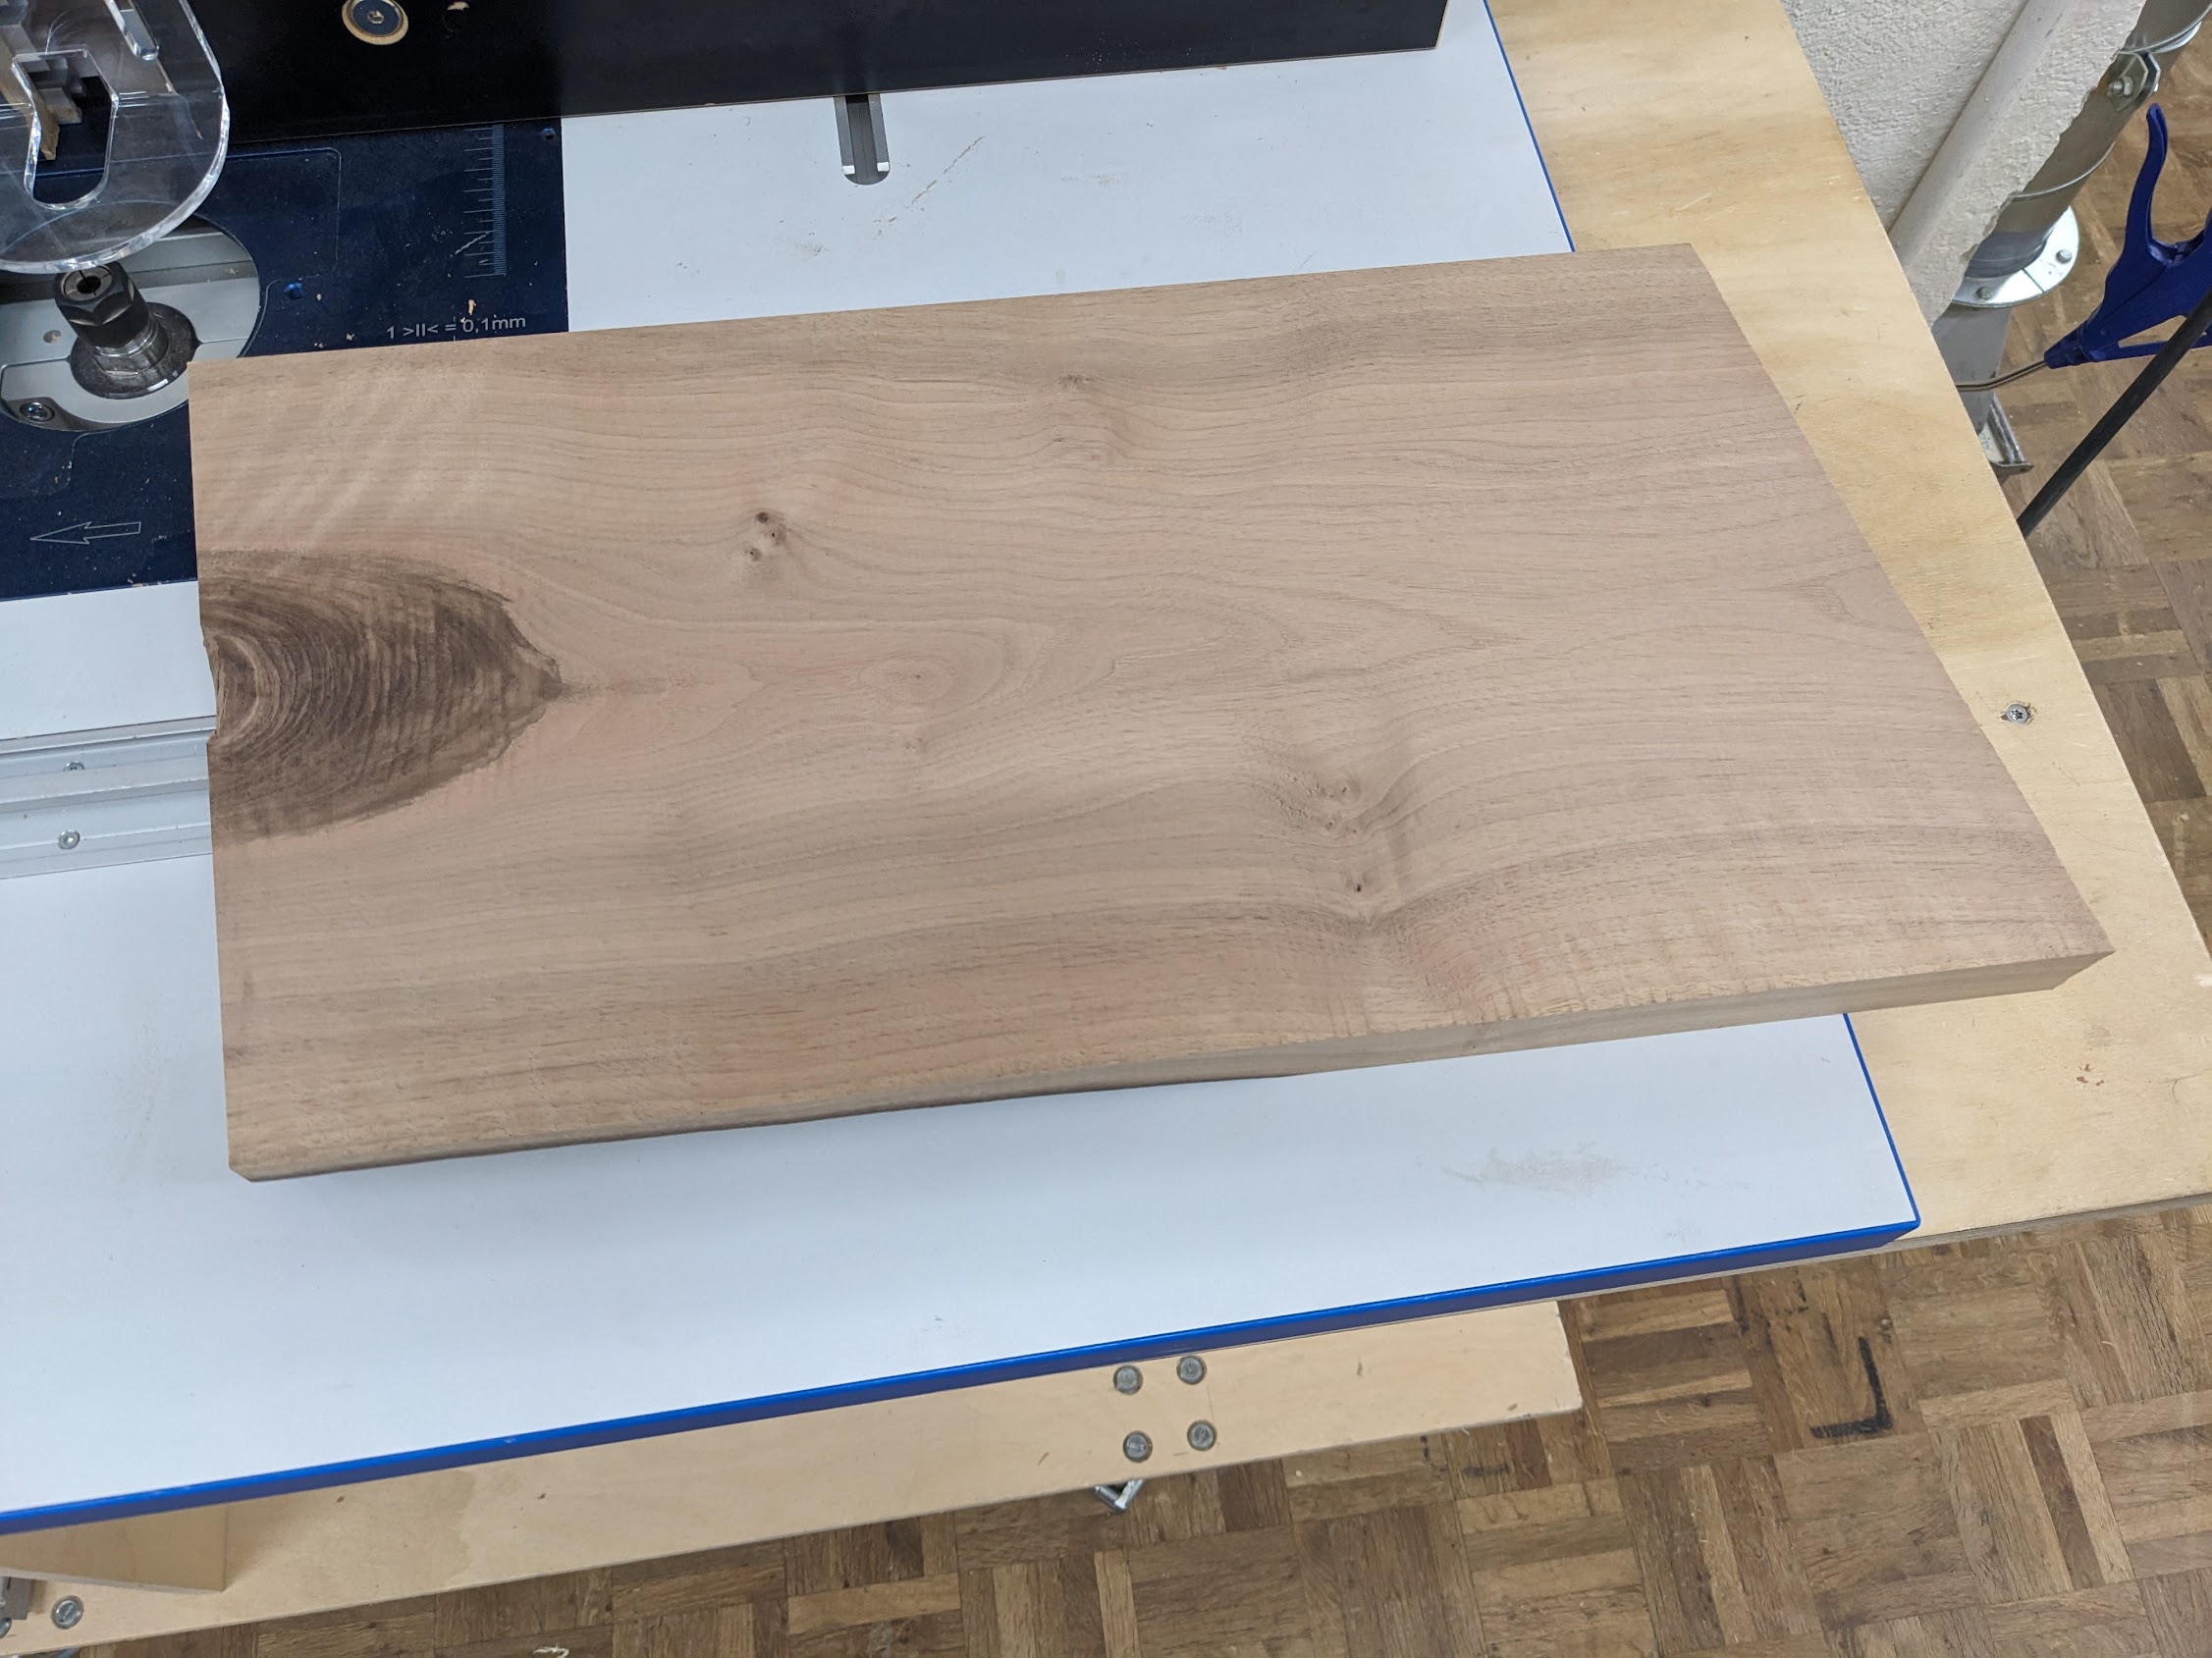
The other side. It’s a bit clearer here on the right short edge that’s it’s not 90 degrees.
Step 5: Making your short sides straight
Now you have the same thickness everywhere, the sides are flat and the long edges are flat as well. The only thing missing now is that your short edges are not perpendicular to the long edges. So we go back to the circular saw. We can now align our long edges (they are flat!) perfectly against the fence, making it easy to get a perpendicular cut.
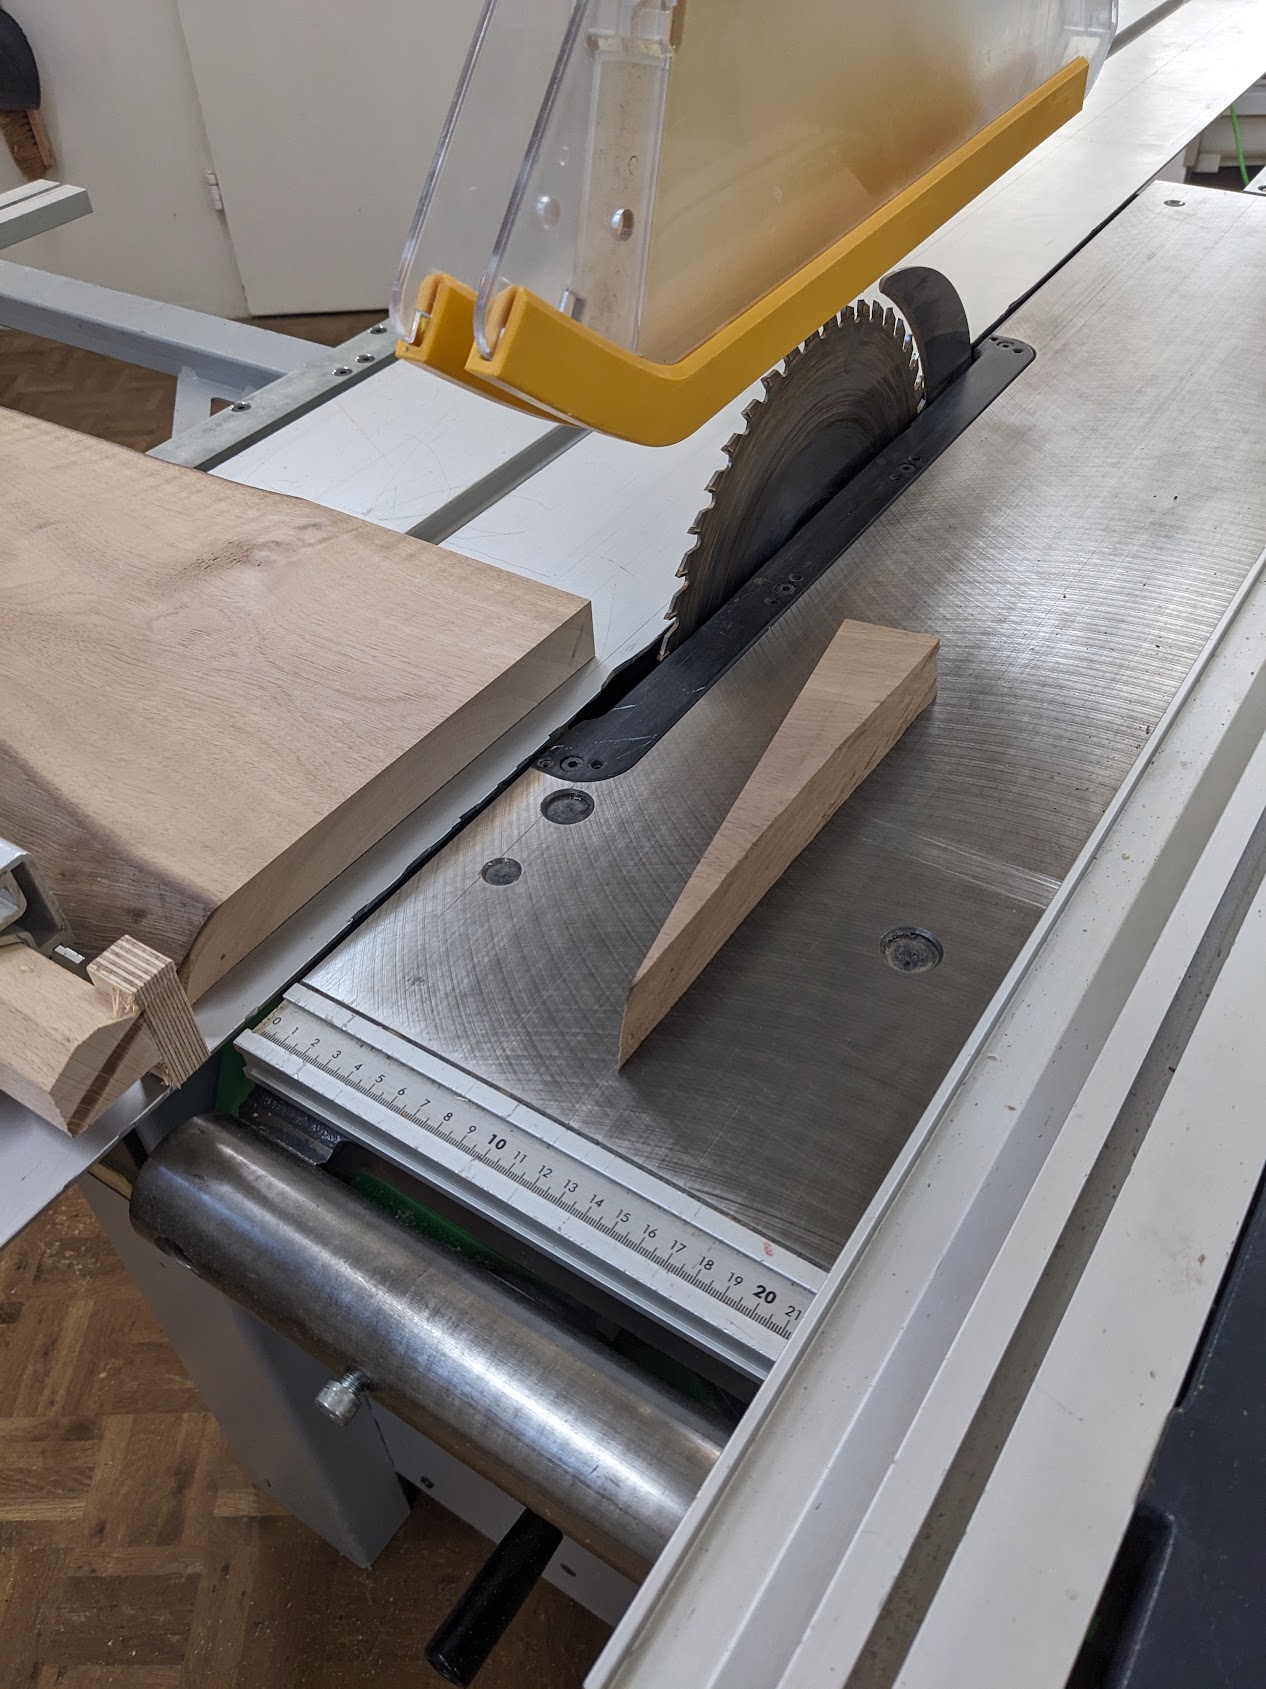
Using the circular saw to do a small cross-cut again.
Step 6: Styling your board (optional)
In this step you can use the other machines to prettify your board. For my 2nd board I liked the rustic-style of the board, so I decided to skip this step. You could for example use the band saw to carve out a handle, or a milling cutter to make a hole on your board to be able to hang it, or a disc sander to make a round edge.
Step 7: Sanding your board
Finally it’s time to sand your board. This step will make your board real smooth. You start with a coarse granularity between 80 and 120 and work your way up to a very fine granularity of 220 (although 220 doesn’t make so much sense if you’re going to use it as a cutting board; your knife will definitely not make it so smooth). You should start with 80 if your board has some rough spots from the thickness planer, as a coarse paper will help remove any imperfection.
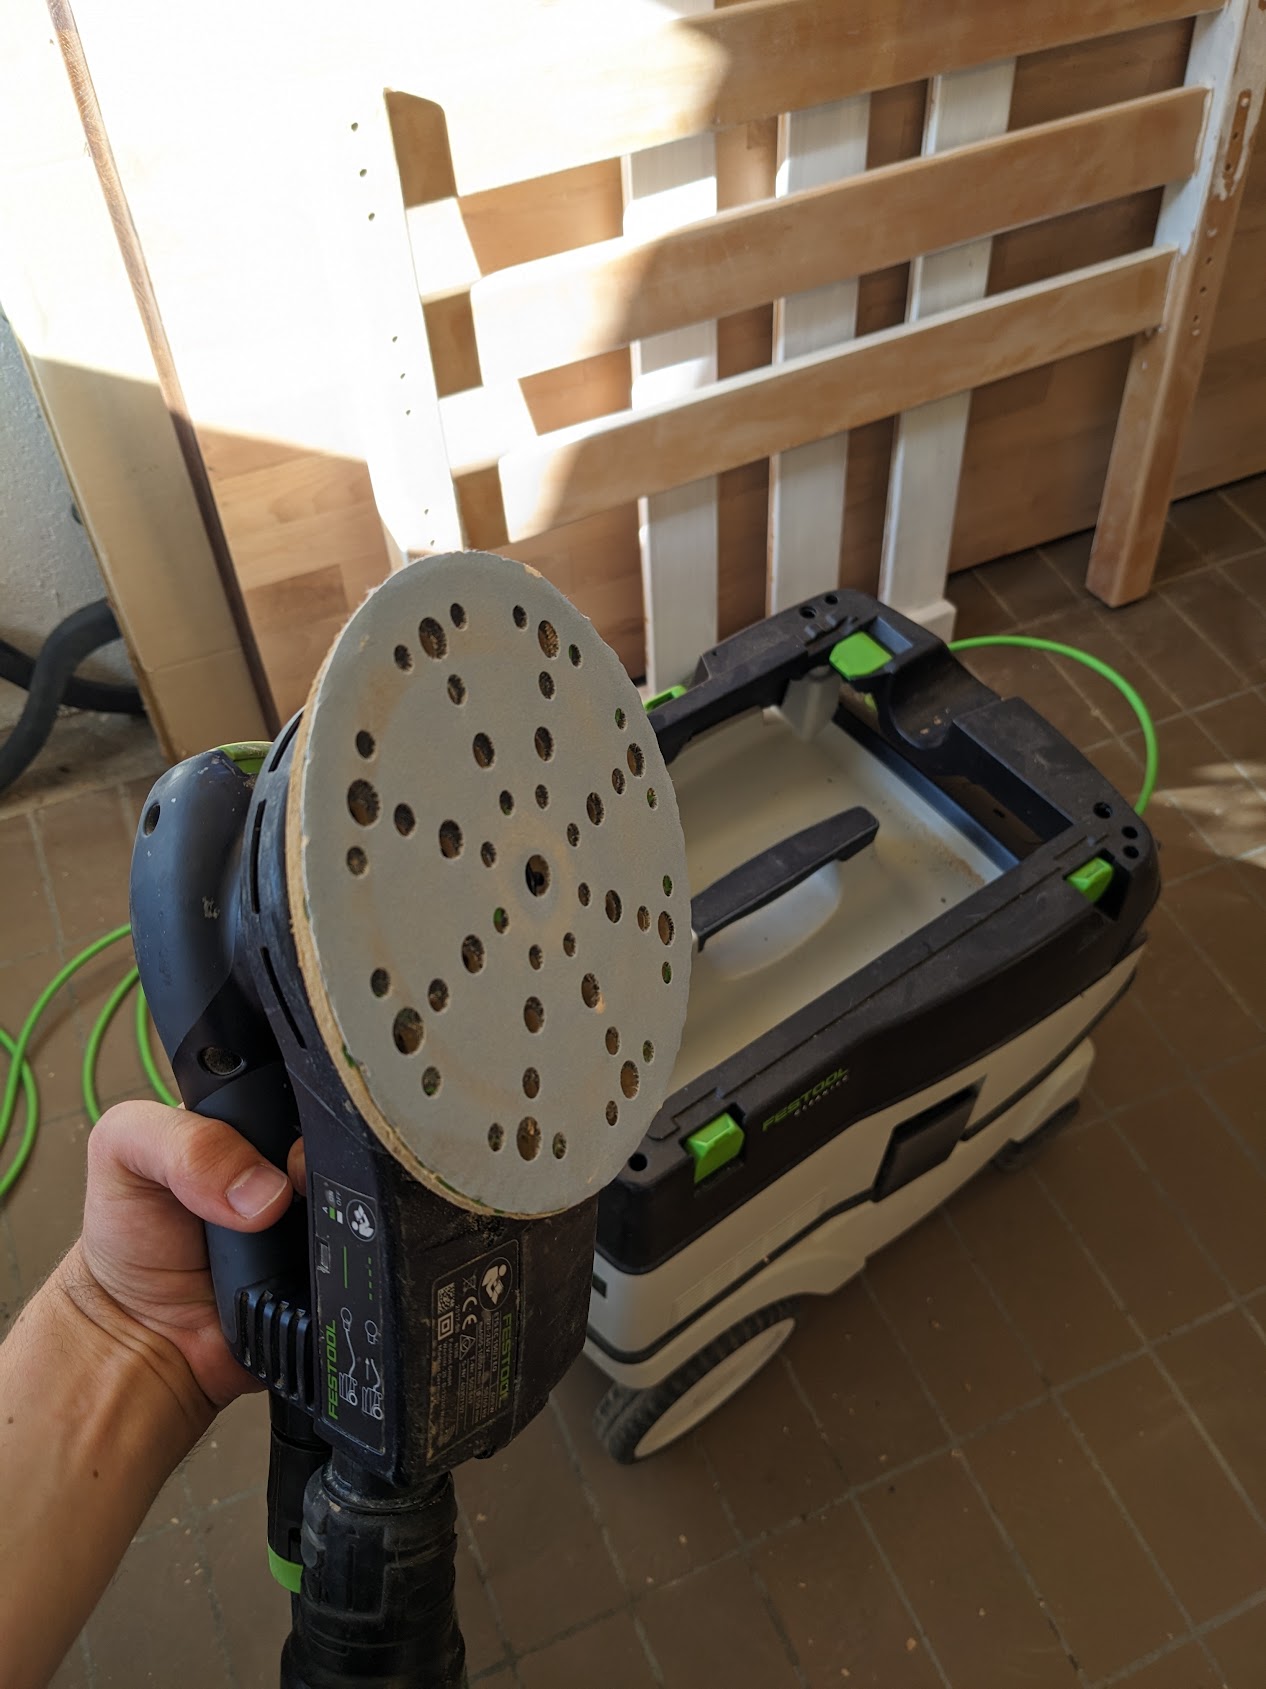
In the workshop there’s sanding machines you can use, they are attached to large vacuums that can move to reduce the amount of dust flying everywhere. Don’t forget to sand the edges as well! But if you have rounded the edges, you may have to use a hand sanding paper instead.
Step 8: Oiling your board
Before oiling the board.
The last step! Oiling your board protects it against water, mold and other elements. Additionally it also gives your board a beautiful color. Because this is a cooking cutting board, make sure you use mineral oil or something that can come in contact with food. It’s recommended to oil it twice, with the second time being 12 hours after. After oiling you need to wait 7 days for it to penetrate the wood before using it.
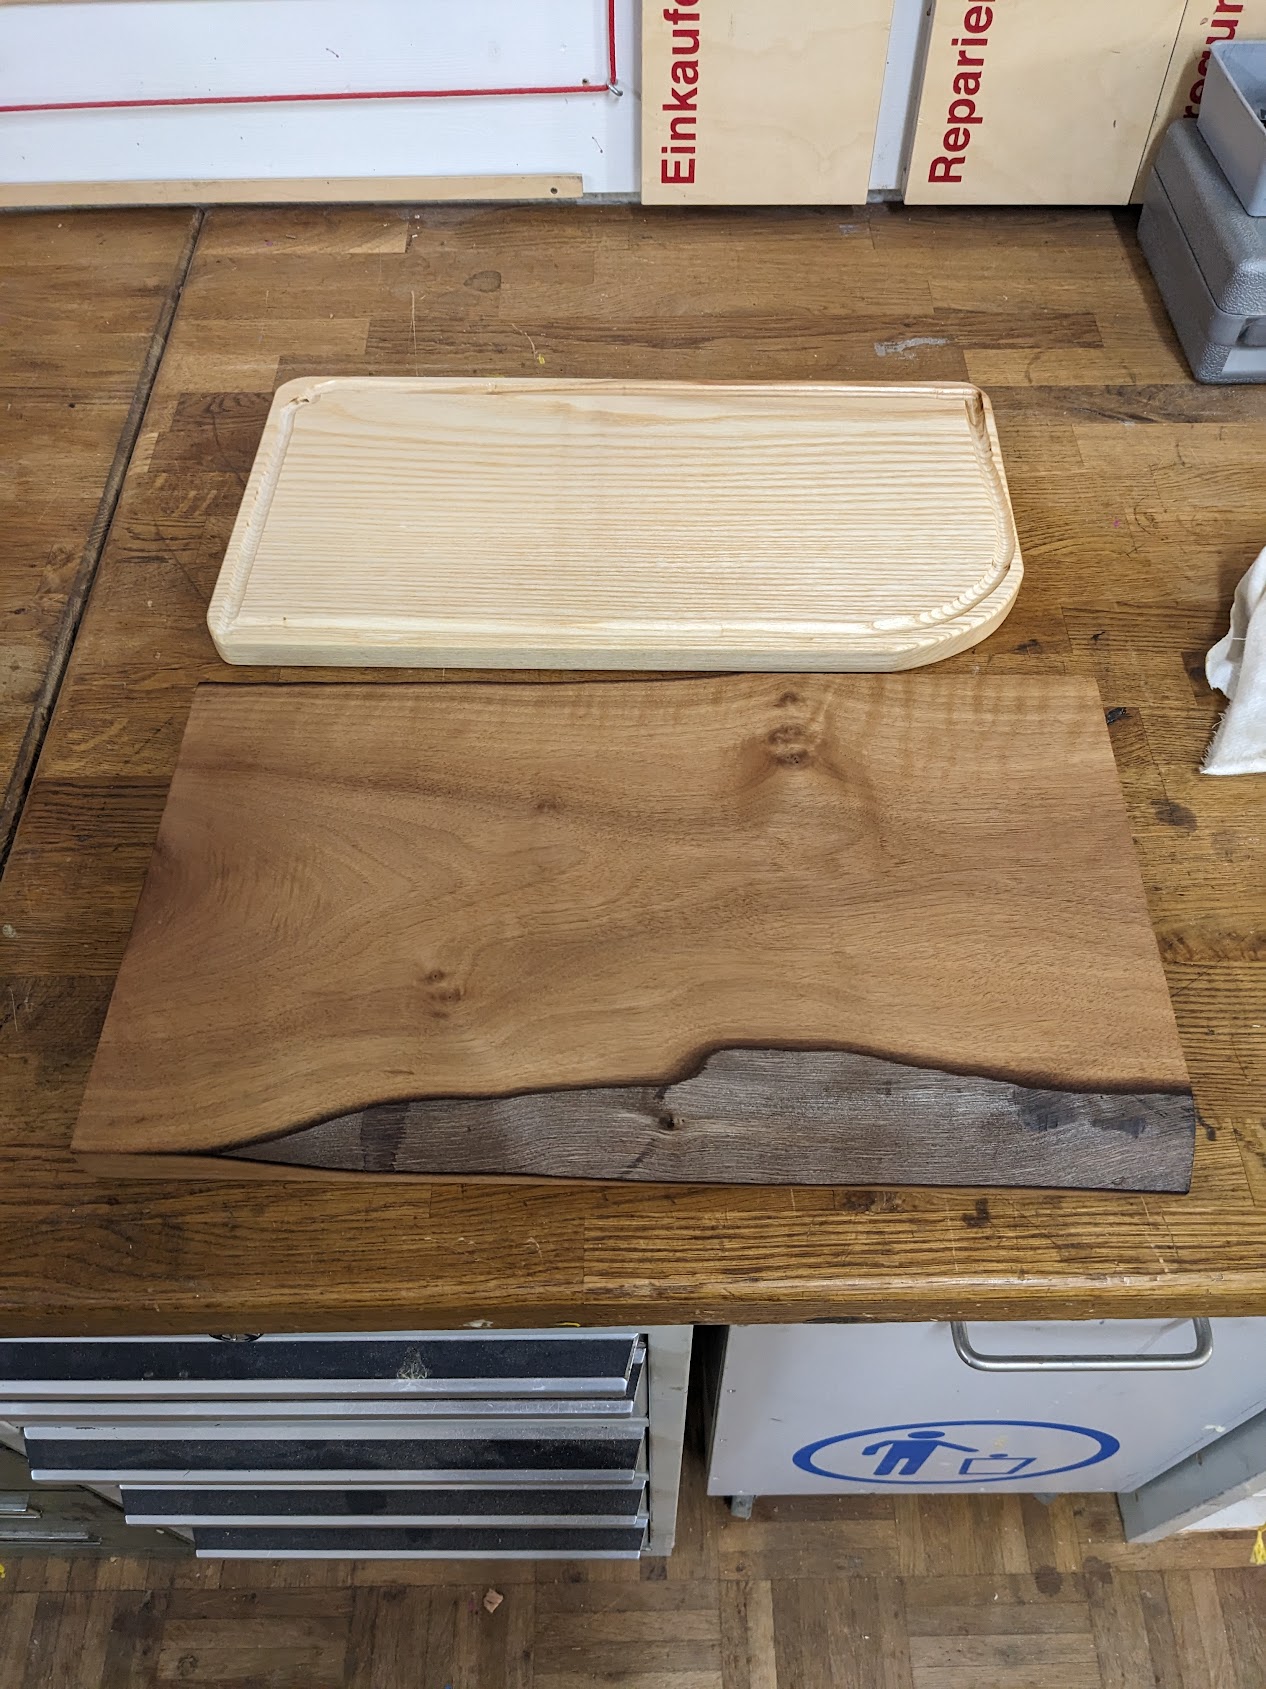
After oiling the board get’s a very nice orange tone. Above you see the first cutting board (out of oak) I made did during the course.
And that’s it, you’re done! It took me about 2 hours to go through this whole process.
Next steps
I really enjoyed the overall experience. I’m not yet very confident in using the table saw, so I often ask for one of the employees to check if my setup is correct. I think this confidence will come with time, as I saw a lot of people freely using these machines without requiring any guidance.
Overall I think it could be a cool hobby and a great skill to have. I’m not entirely sure how often I’d use it, but I think these custom cutting boards make for very nice gifts! I already had two requests from friends, one for a round large serving board and another for a custom wooden shelf to put on top of a radiator.